
What Does It Mean If My Dodge Grand Caravan Is Showing a Check Engine Light?
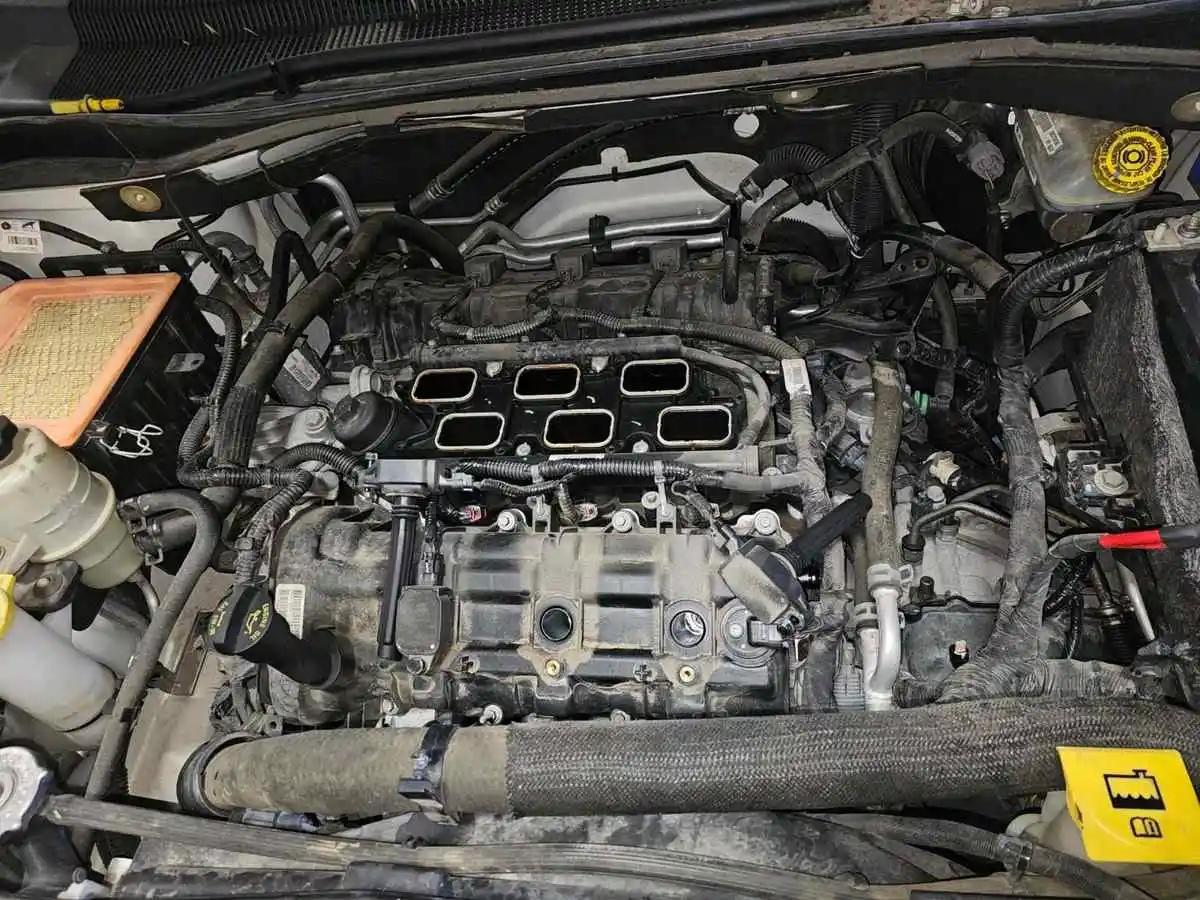
A check engine light typically indicates specific engine malfunctions rather than minor issues, especially when accompanied by performance problems. After servicing multiple Dodge Grand Caravans in Des Moines during our 14 years in business, our ASE-certified technicians confirmed cylinder #4 misfire and catalytic converter efficiency codes, though his testing he was able to identify the actual issue, a faulty exhaust valve seat in the left cylinder head. Our shop performed complete cylinder head rebuild with OEM spec gaskets and comprehensive testing, restoring reliable performance for this Des Moines family vehicle.
Issue: Check engine light with cylinder misfire
Problem: Faulty exhaust valve seat
Solution: Complete cylinder head rebuild performed
Location: Des Moines service
Is Your Dodge Grand Caravan's Engine Giving You a Warning?
When that check engine light comes on in your Dodge Grand Caravan, it's your vehicle's way of telling you something needs immediate attention. After diagnosing multiple check engine light cases in Des Moines vehicles, we've learned this isn't a light you should ignore. It indicates your engine management system has detected a problem that could affect performance, fuel economy, or emissions.
Common warning signs that accompany a check engine light include rough idling, reduced power during acceleration, unusual engine noises, or poor fuel efficiency. You might notice your Grand Caravan hesitating when you press the gas pedal, or hear knocking sounds from under the hood. In our experience with Chrysler 3.6L engines, these symptoms often point to serious issues like cylinder misfires, catalytic converter problems, or engine timing issues that require professional diagnosis.
Don't wait for the problem to get worse. A flashing check engine light indicates severe engine fault is occurring, while a steady light means the system has detected a fault that needs attention soon. As ASE-certified technicians who've prevented countless engine failures, we know getting proper diagnostic testing is crucial to prevent costly engine repair and keep your family vehicle running safely.
Systematic Analysis of Dodge Grand Caravan Engine Management System
This section details the step-by-step diagnostic processes our ASE technicians use to analyze the engine management system within the Dodge Grand Caravan. This ensures comprehensive understanding and effective resolution strategies based on 14 years specializing in Chrysler powertrains.
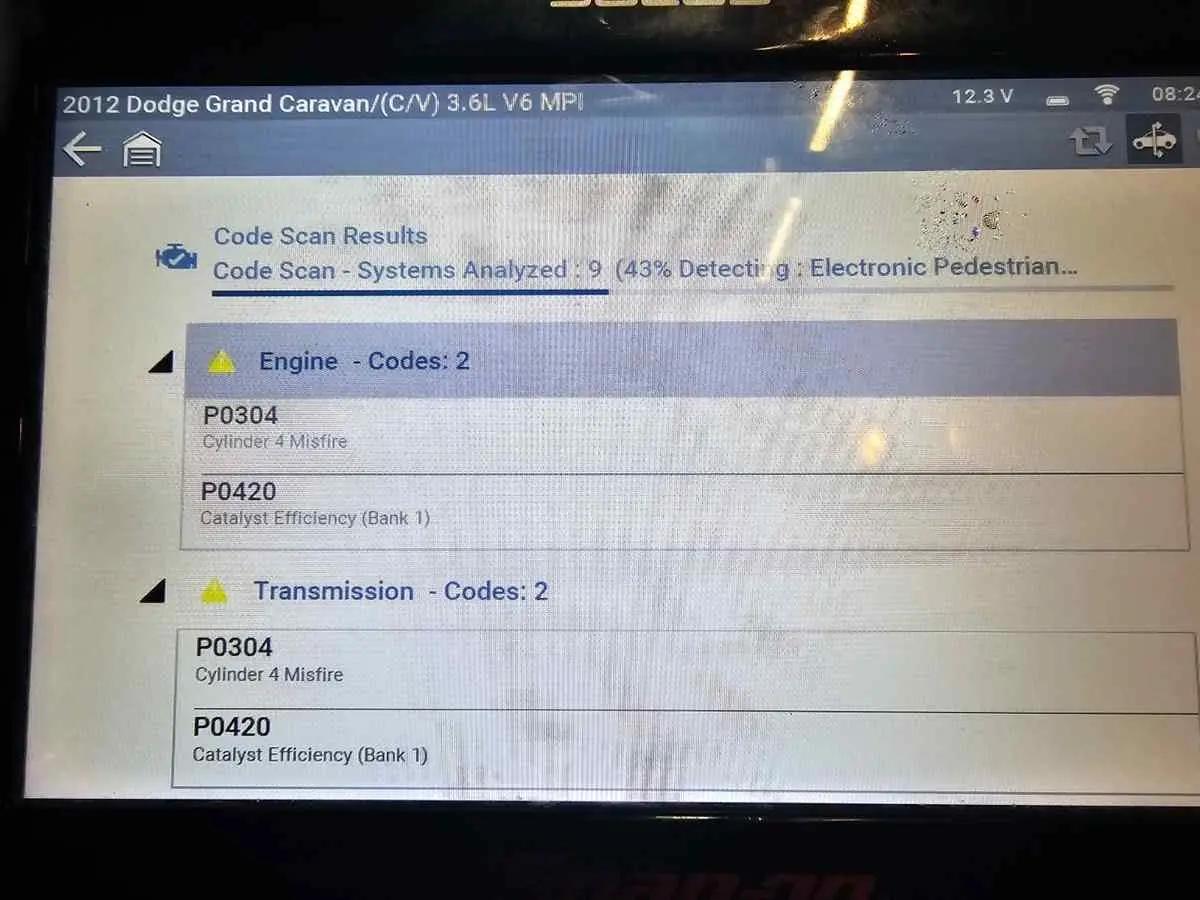
Our diagnostic approach began with connecting our diagnostic scanner to retrieve stored trouble codes from the engine control module. Two critical codes emerged: P0304 indicating cylinder #4 misfire and P0420 signaling catalytic converter efficiency below threshold. Having diagnosed this exact code combination in previous Grand Caravans, these codes provided the initial roadmap for our investigation.
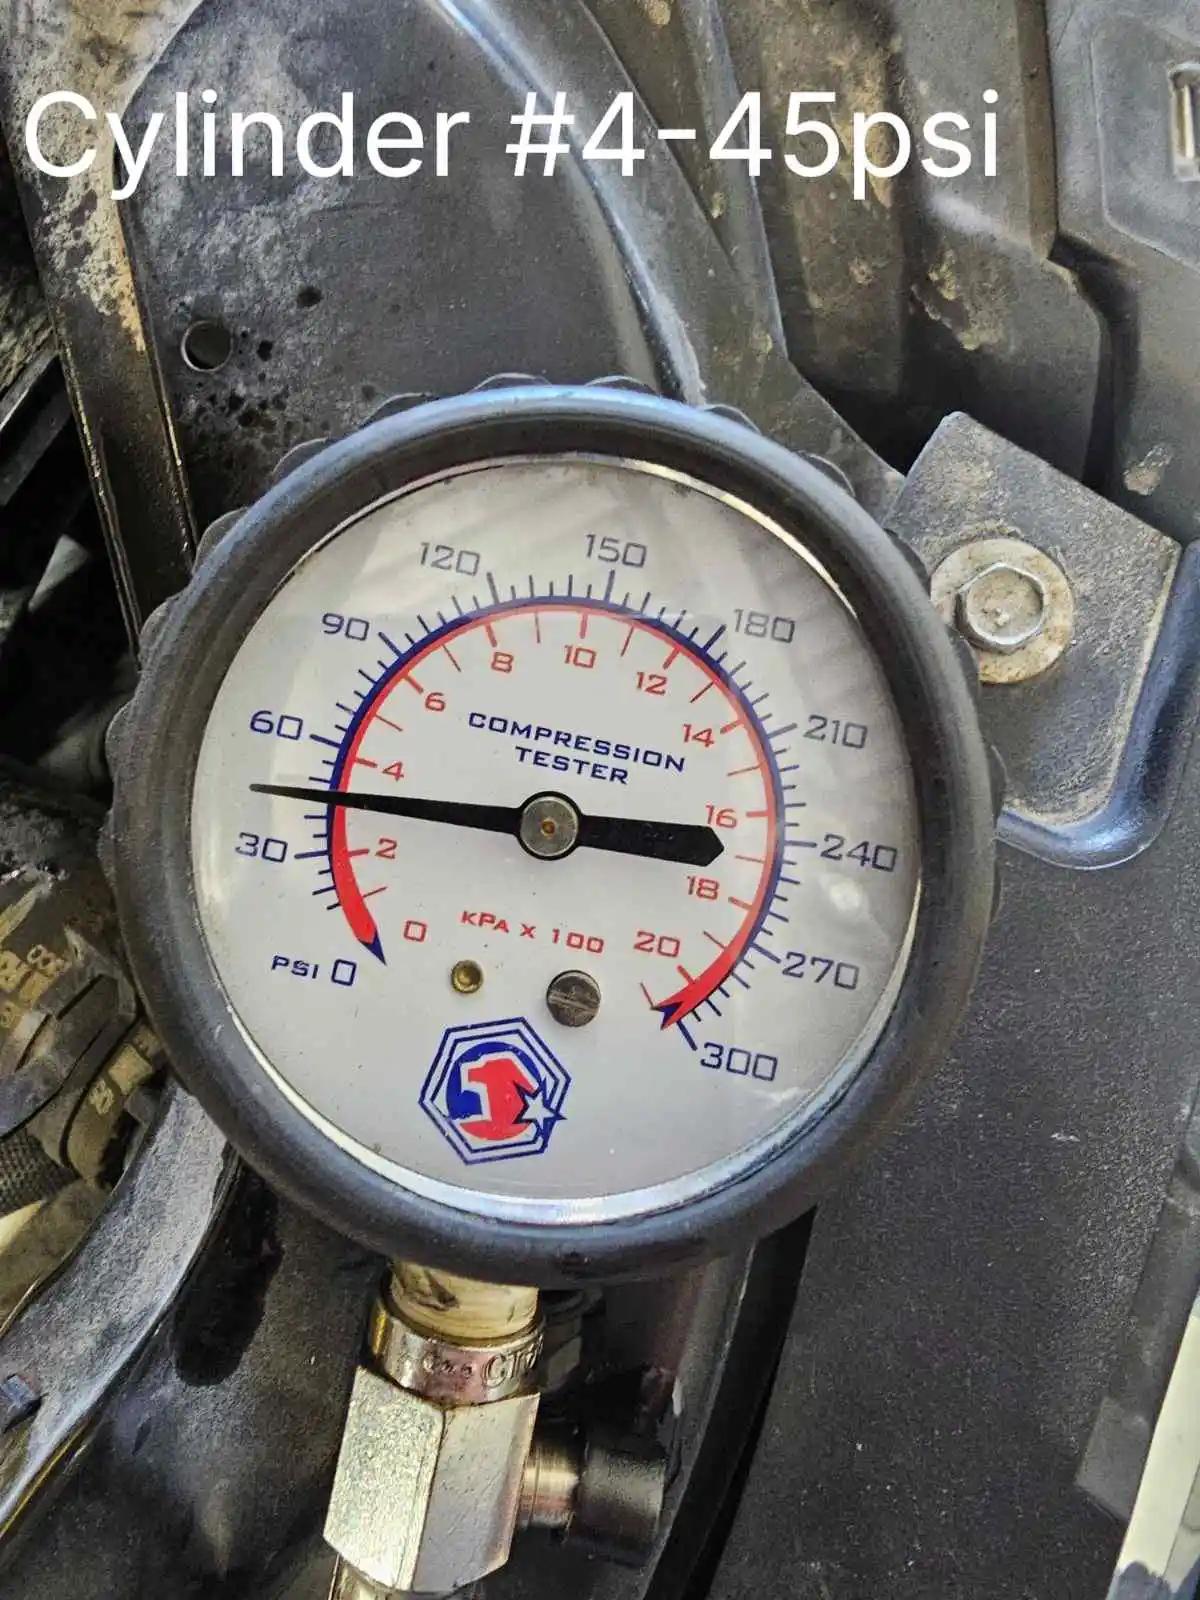
Following our diagnostic process developed over years of Chrysler engine work, we were able to rule out the common issues fuel, and spark. We knew we needed to take a deeper look into this engine issue. We performed a compression test across all cylinders. Cylinder #4 registered 45 PSI and cylinder #6 at 95 PSI compared to the other cylinders at 105 PSI, confirming a mechanical issue beyond simple ignition system problems. This data correlation between the misfire code and low compression readings directed our focus toward internal engine components.
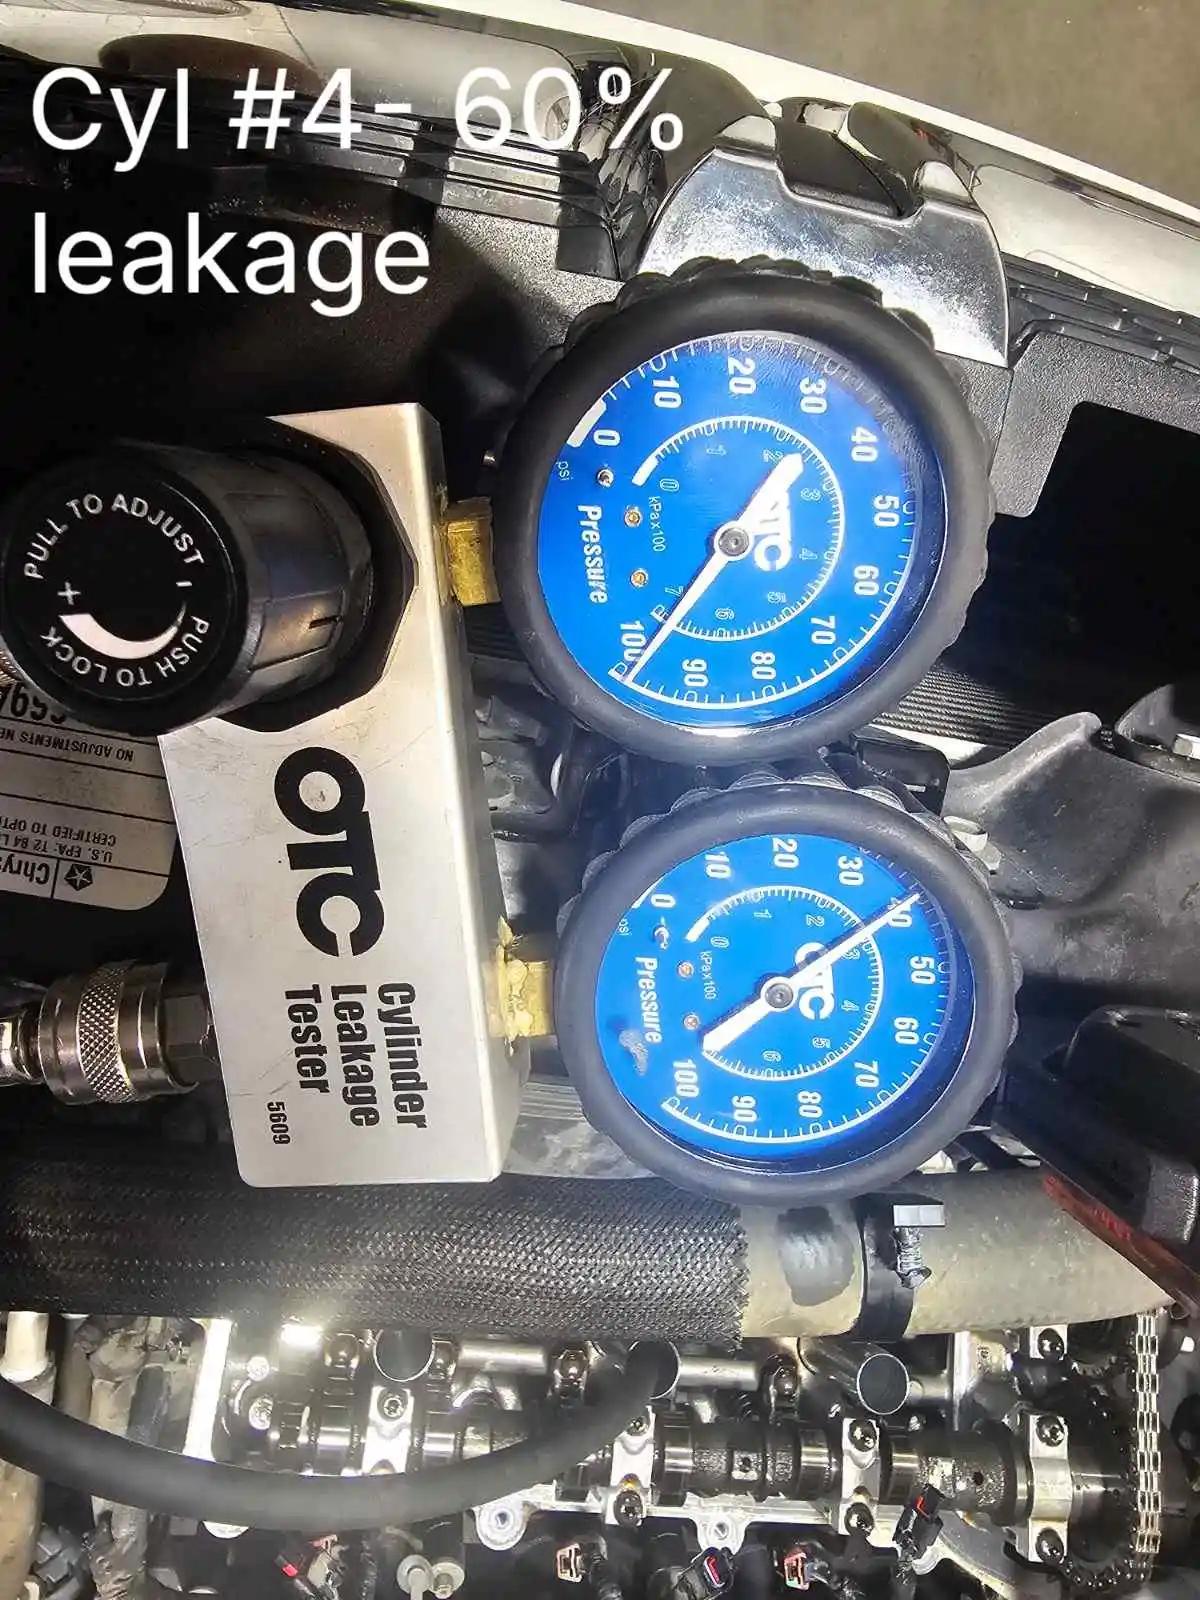
Further investigation we performed a cylinder leakage test, that revealed there was compression leakage getting past the exhaust valve on the #4 cylinder. An audible air leak at the tailpipe of the exhaust system further confirms our findings.
Using our borescope revealed the root cause: a compromised exhaust valve seat in cylinder #4 showing visible carbon scoring and seat recession. This mechanical failure created a dual problem. The faulty valve seat caused the cylinder #4 misfire while simultaneously allowing unburned fuel to pass into the exhaust system, overwhelming the catalytic converter and triggering the efficiency code. The PO420 code was a secondary code being set as a result of the low compression and engine misfire, not a bad catalytic converter. Many times we find that the root cause of a trouble code is not the component that registered the fault. Its just where the computer detected a problem.
Resolution Steps for Dodge Grand Caravan: Cylinder Head Repair
At Joey's Auto Shop we pride ourselves in proper complete repairs. To resolve the cylinder #4 misfire and catalytic converter efficiency issues in this Dodge Grand Caravan, our ASE-certified technician begins a comprehensive engine repair that addresses the root mechanical failure. To ensure a quality repair we always send the cylinder heads to a machine shop where they can be properly tested, repaired, and verified. So when we return your vehicle we can confidently say its fixed. We began by carefully removing the intake manifold and associated components to gain access to the compromised cylinder head assembly.
Step-by-Step Repair Process
- Remove intake manifold and associated components
- Remove cylinder head
- Install the reconditioned cylinder head assembly
- Install new headgaskets and new head bolt set
- Replace thermostat housing with OEM unit
- Install fresh spark plugs throughout all cylinders
- When finished we perform an oil and filter service using premium Castrol GTX 5W-30 oil (this ensures our repair is clean from any contanimates)
The final step involved comprehensive road testing and diagnostic verification using our scanner to confirm that both the P0304 misfire code and P0420 catalytic converter efficiency code were resolved, restoring the vehicle's performance to manufacturer specifications.
What should I do if my check engine light with my Dodge Grand Caravan indicates potential engine damage?
If your check engine light is on in your Dodge Grand Caravan, stop driving immediately if the light is flashing. This indicates an active, severe engine failure is occurring. After witnessing multiple complete engine failures from ignored flashing lights, we know a steady check engine light means you should have it diagnosed within 24-48 hours to prevent costly engine repair. Never ignore this warning as it can lead to expensive and often unessasrily complex failures that could leave you stranded.
How does a faulty exhaust valve seat affect my Dodge Grand Caravan's engine performance?
A compromised exhaust valve seat creates a cascade of problems in your engine system. Based on our analysis of similar cases, it causes cylinder misfires by preventing proper compression, reduces power output by 15-20% or more. In some cases it can lead to other failures such as burnt engine valves. A damaged valve seat allows unburned fuel to enter the exhaust system. This unburned fuel overwhelms your catalytic converter, triggering efficiency codes and potentially damaging this emissions component. The result is poor performance, reduced fuel economy, and multiple diagnostic trouble codes requiring comprehensive repair.
How can I prevent cylinder head problems in my Dodge Grand Caravan?
Regular maintenance is key to preventing cylinder head issues based on our years servicing Chrysler engines. We recommend changing your oil every 5,000 miles using quality oil meeting Chrysler specifications. Stick to your OEM Spark plug maintenance schedule, a lot of spark plugs can go 60-100k miles between service. Regular carbon cleaning is crucial and often overlooked component to engine maintenance. Other than oil maintenance, carbon is the other main culprit, Carbon will rob engines of performance, eat away at your gas miles. Carbon deposits cause damage to valves and valves seats. It gradually builds up overtime and before you realize it you have a similar problem where the engine valves are no longer sealing as needed. Address check engine lights promptly rather than ignoring them. Following your manufacturer's maintenance schedule and addressing small issues quickly prevents major engine repair needs.
Don't Wait! Get Your Engine Diagnostics Today in Des Moines
If you're experiencing issues with your vehicle, don't hesitate! At Joey's Auto Shop, our ASE-certified technicians are ready to provide you with professional vehicle diagnostics, we share our finding through our digital inspection process. Located in Des Moines at 5875 Fleur Drive conveniently located across from the Des Moines International Airport. Call us today at 515-745-0934for assistance and get back on the road safely. Our skilled technicians with 14+ years of Chrysler experience are here to help you today!
Contact Us
Book your visit online or give us a call at 515-745-0934. We're open Monday through Friday, 7:30 AM to 5:00 PM.
Cold Start Misfire on your Ford F-150
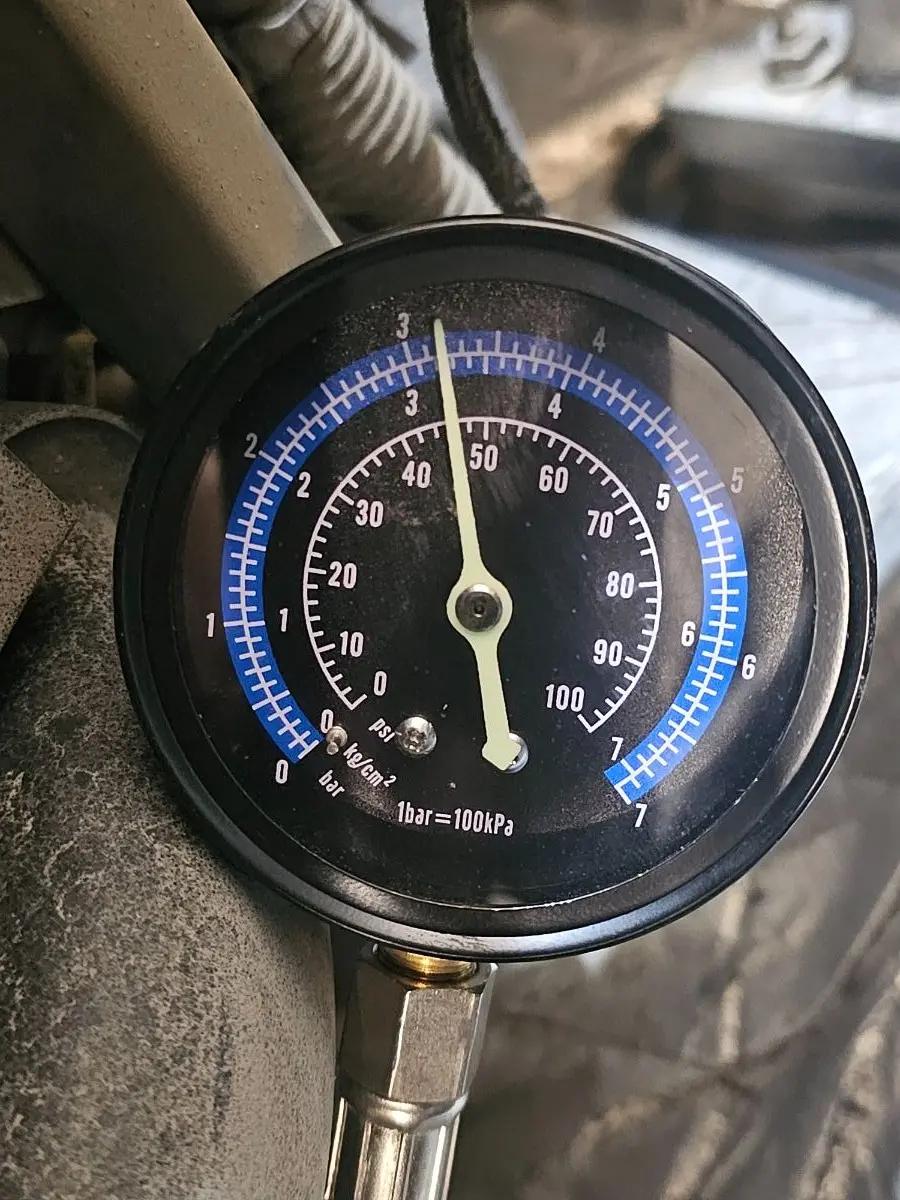
A 2014 Ford F-150 STX equipped with the 3.5L EcoBoost engine came into our shop with a rough idle and an illuminated check engine light. Our ASE-certified technician performed a complete diagnostic inspection and discovered the root cause: a leaking fuel injector in cylinder #4.
Vehicle Concern
- Issue: Check engine light with cold start misfires
- Problem: Leaking fuel injector in cylinder #4
- Solution: Replaced faulty fuel injector and performed a GDI fuel induction service
- Location: Des Moines Service
Professional Fuel Injection System Analysis
Every vehicle that enters our shop receives a courtesy inspection before we begin diagnosing the specific concern. This allows us to establish the vehicle's overall condition and provide our customers with the information needed to make informed repair decisions.
During the diagnostic process, our scan tool retrieved the following trouble codes:
- P0300 – Random/Multiple Cylinder Misfire
- P0304 – Cylinder #4 Misfire Detected
- P0316 – Misfire Detected During First 1,000 Revolutions
Our technician removed the spark plug from cylinder #4 and found it damp with a strong fuel odor. This prompted additional testing, including a fuel pressure bleed-down test.
Initial fuel pressure measured 52 PSI with the key on and engine off. Aftern five minutes, pressure dropped to 45 PSI, indicating fuel leakage within the system.
Using a borescope, our technician inspected the combustion chamber and confirmed that fuel was leaking directly into cylinder #4. The piston crown showed a clean, damp area consistent with a leaking fuel injector.
Fuel Injector Replacement and GDI Cleaning Service
To correct the issue, our ASE-certified technician safely depressurized the fuel system and removed the faulty injector. The injector bore was inspected for damage and contamination before installation of the replacement injector.
New seals were installed on all injectors and all fasteners were tightened to manufacturer specifications.
To complete the repair, we performed a BG Fuel & Air Induction Service. This service is especially important on Gasoline Direct Injection (GDI) engines, where fuel no longer washes over the intake valves during normal operation.
Carbon deposits naturally accumulate inside the combustion chamber and on valve surfaces. Removing these deposits helps restore airflow, improve performance, and maximize fuel economy.
How Does a Leaking Fuel Injector Affect Engine Performance?
A leaking fuel injector disrupts the precise air-fuel mixture required for proper combustion. Fuel entering the cylinder while the engine is off creates an overly rich condition during startup, resulting in rough idle, cold start misfires, and reduced performance.
If left unresolved, excess fuel can wash oil from the cylinder walls and piston rings, potentially leading to internal engine damage, cylinder wall scoring, increased oil consumption, and costly repairs.
During our inspection, a borescope evaluation confirmed that no internal engine damage had occurred and the issue was caught before more serious problems developed.
Why Professional Diagnostics Matter
This repair highlights the importance of proper diagnostic testing. Simply replacing parts based on symptoms or clearing fault codes can lead to repeat failures and unnecessary expense.
By combining advanced diagnostic equipment, proven testing procedures, and over 50 years of combined technician experience, our team identified the exact failure point and repaired the vehicle correctly the first time.
Experiencing Ford F-150 Engine Problems?
If your Ford F-150 is experiencing check engine lights, rough idle, misfires, or other performance concerns, our ASE-certified technicians are here to help.
Joey's Auto Shop has proudly served Des Moines drivers for more than 14 years, roviding professional diagnostics, quality repairs, and exceptional customer care.
Call 515-745-0934 today to schedule your diagnostic inspection nd get your truck running at its best.
06/04/2026Read more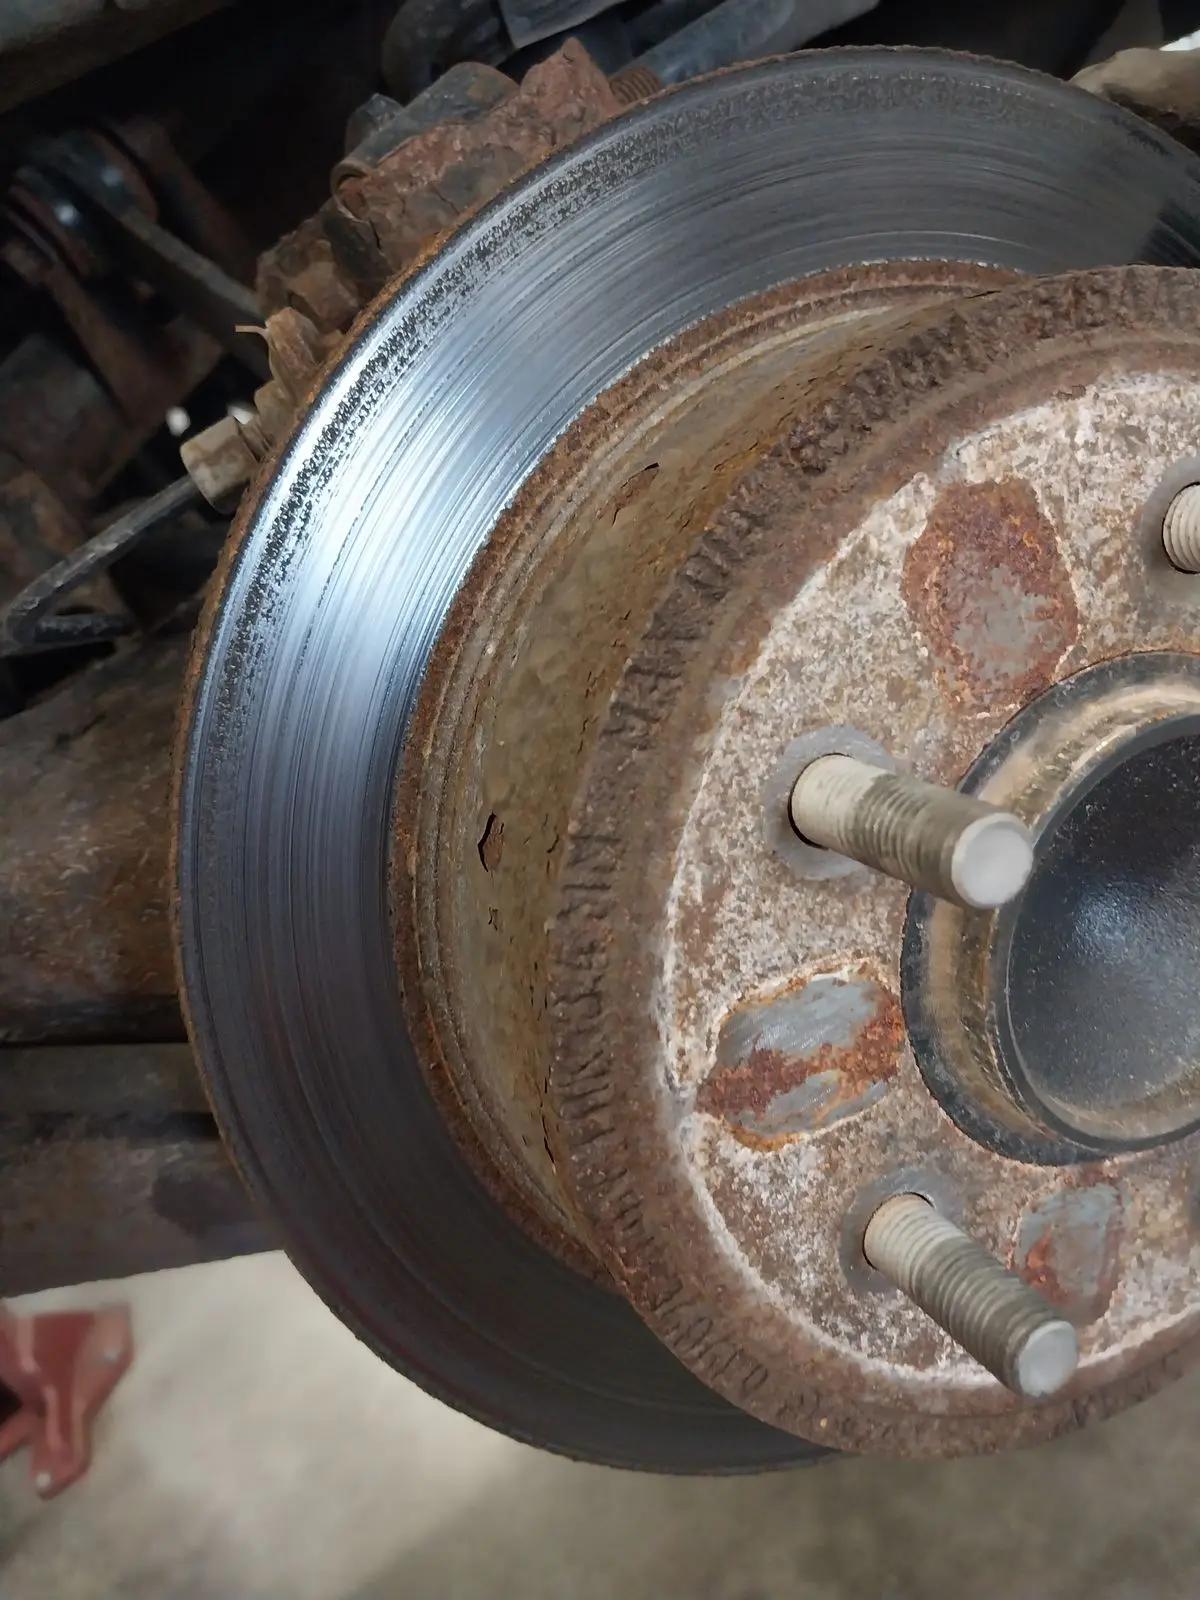
Do You Have Concerns About Your Brakes?
Why Is My Steering Wheel Vibrating When I Brake?
If your steering wheel vibrates when you apply the brakes, do not ignore it. While the vibration may seem like a minor annoyance, it is often an early warning sign that something in your braking system needs attention.
In many cases, the cause is worn or damaged brake components, including uneven brake rotors, worn brake pads, or brake hardware that is no longer operating correctly.
At Joey's Auto Shop in Des Moines, Iowa, we have diagnosed and repaired countless vehicles experiencing steering wheel vibration during braking. One recent example involved a 2017 Mazda CX-9 Grand Touring that developed noticeable steering wheel shake whenever the brakes were applied at highway speeds.
After performing our comprehensive inspection and testing procedure, we identified excessive rotor wear on both the front and rear axles. Following a complete brake service, the vibration was eliminated, restoring smooth, confident braking and giving the customer peace of mind.
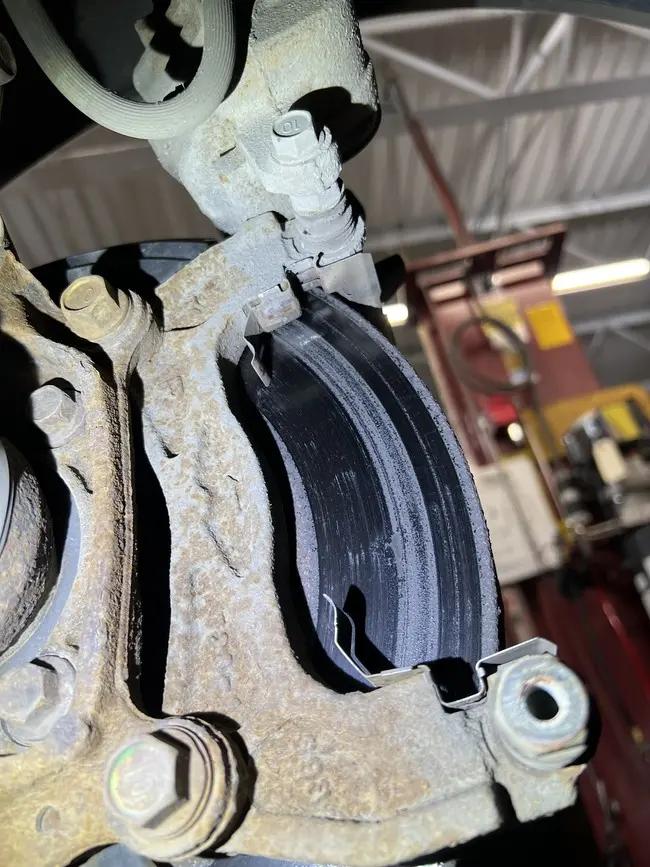
2017 Mazda CX-9 Brake Repair Summary
- Vehicle: 2017 Mazda CX-9 Grand Touring
- Customer concern: Steering wheel vibration while braking, especially at highway speeds
- Root cause: Uneven and worn brake rotors, along with worn brake components on the front and rear brake systems
- Repair performed: Replacement of all four brake rotors and brake pads using OEM-specification components
- Location: Joey's Auto Shop in Des Moines, Iowa
Joey's Auto Shop provides professional maintenance and repair for Mazda vehicles, including brake diagnosis, scheduled maintenance, suspension repair, and complete vehicle inspections.
Why Does My Steering Wheel Shake When I Brake?
Your steering wheel should not shake when you press the brake pedal.
If it does, the vibration is usually being transmitted through the braking system into the vehicle's steering and suspension components. Although several problems can cause this symptom, brake rotor irregularities are among the most common causes.
Every time you apply the brakes, the brake pads squeeze against the rotors to slow the vehicle. If the rotors develop uneven thickness, excessive wear, heat damage, or inconsistent brake pad deposits, the pads can no longer maintain smooth and consistent contact with the rotor surface.
Instead, the brake pads may grab and release repeatedly as the wheel rotates. This produces a pulsation that can travel through the brake pedal, suspension, and steering wheel.
Many drivers first notice this vibration while slowing down from approximately 50 to 70 mph or during heavier braking on the highway.
Ignoring brake vibration can increase stopping distances, accelerate brake wear, and place additional stress on related steering and suspension components. Scheduling a professional brake inspection and repair service can help identify the problem before it becomes more serious.
Common Causes of Steering Wheel Vibration During Braking
Warped or Uneven Brake Rotors
Although drivers and technicians commonly use the phrase “warped rotors,” many brake pulsation concerns are actually caused by uneven rotor thickness or inconsistent brake pad material deposits created by excessive heat.
Common causes of uneven rotor surfaces include:
- Repeated hard braking
- Heavy stop-and-go traffic
- Towing heavy loads
- Overheated brake components
- Improper wheel-lug torque
- Normal wear over time
As the rotor surface becomes uneven, the brake pads no longer apply consistent pressure. The resulting variation in braking force can be felt as a vibration or pulsation.
Learn more about the purpose of your vehicle's rotors and when they may need replacement on our brake rotor service page.
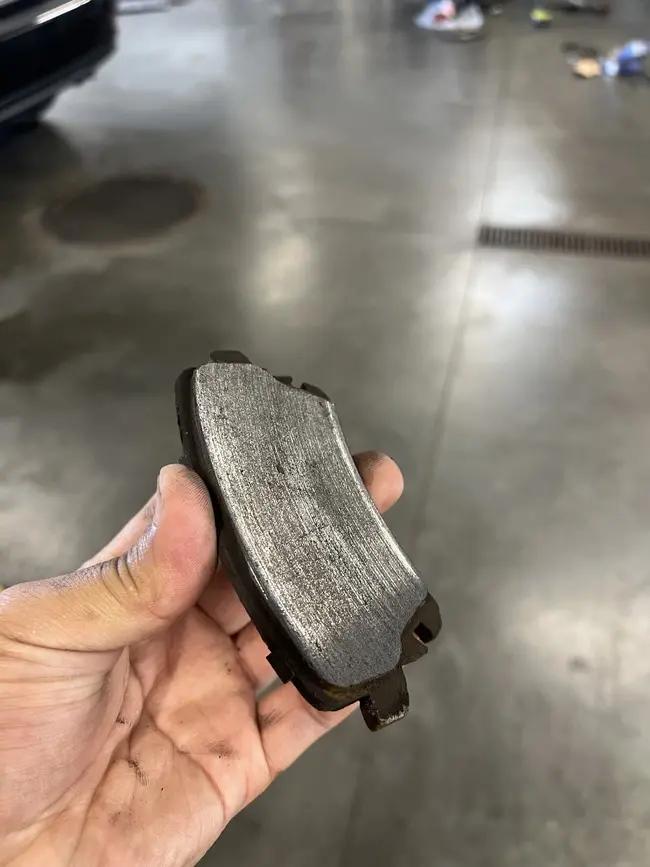
Uneven Brake Pad Wear
Brake pads should wear evenly on both sides of each rotor. When one pad wears faster than another, braking force can become uneven.
Uneven brake pad wear can be caused by:
- Sticking or seized caliper slide pins
- Brake calipers that do not retract properly
- Corroded or damaged brake hardware
- Low-quality brake pad materials
- Lack of routine brake maintenance
Uneven brake pad wear may contribute to vibration, reduce braking efficiency, and accelerate rotor damage. Our technicians inspect the complete braking system rather than replacing pads without determining why they wore improperly.
Visit our brake pad replacement page to learn more about brake pad wear and replacement.
Sticking or Damaged Brake Calipers
The brake caliper applies pressure to the pads when you press the brake pedal. If a caliper piston or slide pin sticks, one brake may remain partially applied or fail to apply evenly.
Possible symptoms of a sticking brake caliper include:
- Vehicle pulling to one side while braking
- Uneven brake pad wear
- Excessive heat near one wheel
- A burning smell after driving
- Reduced fuel economy
- Brake vibration or pulsation
Professional brake caliper diagnosis and repair can determine whether the caliper, slide pins, brake hose, or related hardware is responsible.
Suspension or Steering Problems
Although less common, worn steering and suspension components can cause or amplify vibrations during braking.
Components that should be inspected include:
- Tie rod ends
- Ball joints
- Control arm bushings
- Wheel bearings
- Shocks and struts
- Other suspension bushings
That is why every brake diagnosis at Joey's Auto Shop includes an evaluation of related components when appropriate. Depending on the findings, the vehicle may also require steering repair, suspension repair, tie rod end repair, or wheel bearing service.
Additional Brake Warning Signs
Steering wheel vibration is rarely the only symptom of a brake problem. Watch for the following warning signs:
- Brake pedal pulsation
- Grinding noises while braking
- Squealing or squeaking brakes
- Longer stopping distances
- Vehicle pulling while braking
- Grooves visible on the brake rotor surface
- A burning smell after driving
- A brake or ABS warning light
If you notice one or more of these symptoms, have the vehicle inspected before additional damage occurs. Prompt diagnosis can often prevent a relatively straightforward brake repair from becoming a larger and more expensive repair.
How We Diagnosed This 2017 Mazda CX-9
The customer reported that the steering wheel shook whenever the brakes were applied, particularly at speeds above 40 mph.
Rather than immediately replacing parts, we followed a complete diagnostic procedure to identify the actual cause of the concern.
Our inspection included:
- Brake pad thickness measurements
- Brake rotor condition inspection
- Brake hardware inspection
- Brake caliper operation testing
- Steering and suspension component inspection
- Test-drive verification
Joey's Auto Shop uses detailed digital vehicle inspections to document vehicle conditions and help customers understand our findings through notes and photos.
Diagnostic Results
Front Brake Rotors
The front rotors exhibited excessive heat damage, surface grooves, and rotor thickness variation. These conditions caused the brake pads to make inconsistent contact with the rotors, producing pulsation during braking.
Rear Brake Rotors
The rear rotors showed similar wear patterns. This confirmed that the vibration was not limited to the front axle and that both the front and rear brake systems required attention.
Brake Pad Measurements
- Front brake pads: 4 mm
- Rear brake pads: 3 mm
Although the pads had worn relatively evenly, they had reached the point where replacement was recommended. Had abnormal wear been present, further testing of the caliper slide pins, caliper pistons, and hydraulic system would have been required.
Brake Repair Procedure
After confirming the diagnosis and receiving the customer's authorization, our ASE-certified technician performed a complete front and rear brake service.
The repair included:
- Safely raising and supporting the vehicle on a lift
- Removing all four wheels
- Inspecting the complete front and rear brake systems
- Removing the worn brake pads and rotors
- Cleaning and inspecting the brake hardware
- Installing new OEM-specification brake rotors
- Installing premium ceramic brake pads
- Verifying proper brake caliper operation
- Performing a controlled brake bedding procedure
- Conducting an extensive road test
The Mazda was tested under multiple braking conditions, including city driving and highway speeds. Following the repair, braking performance was smooth, quiet, and vibration-free.
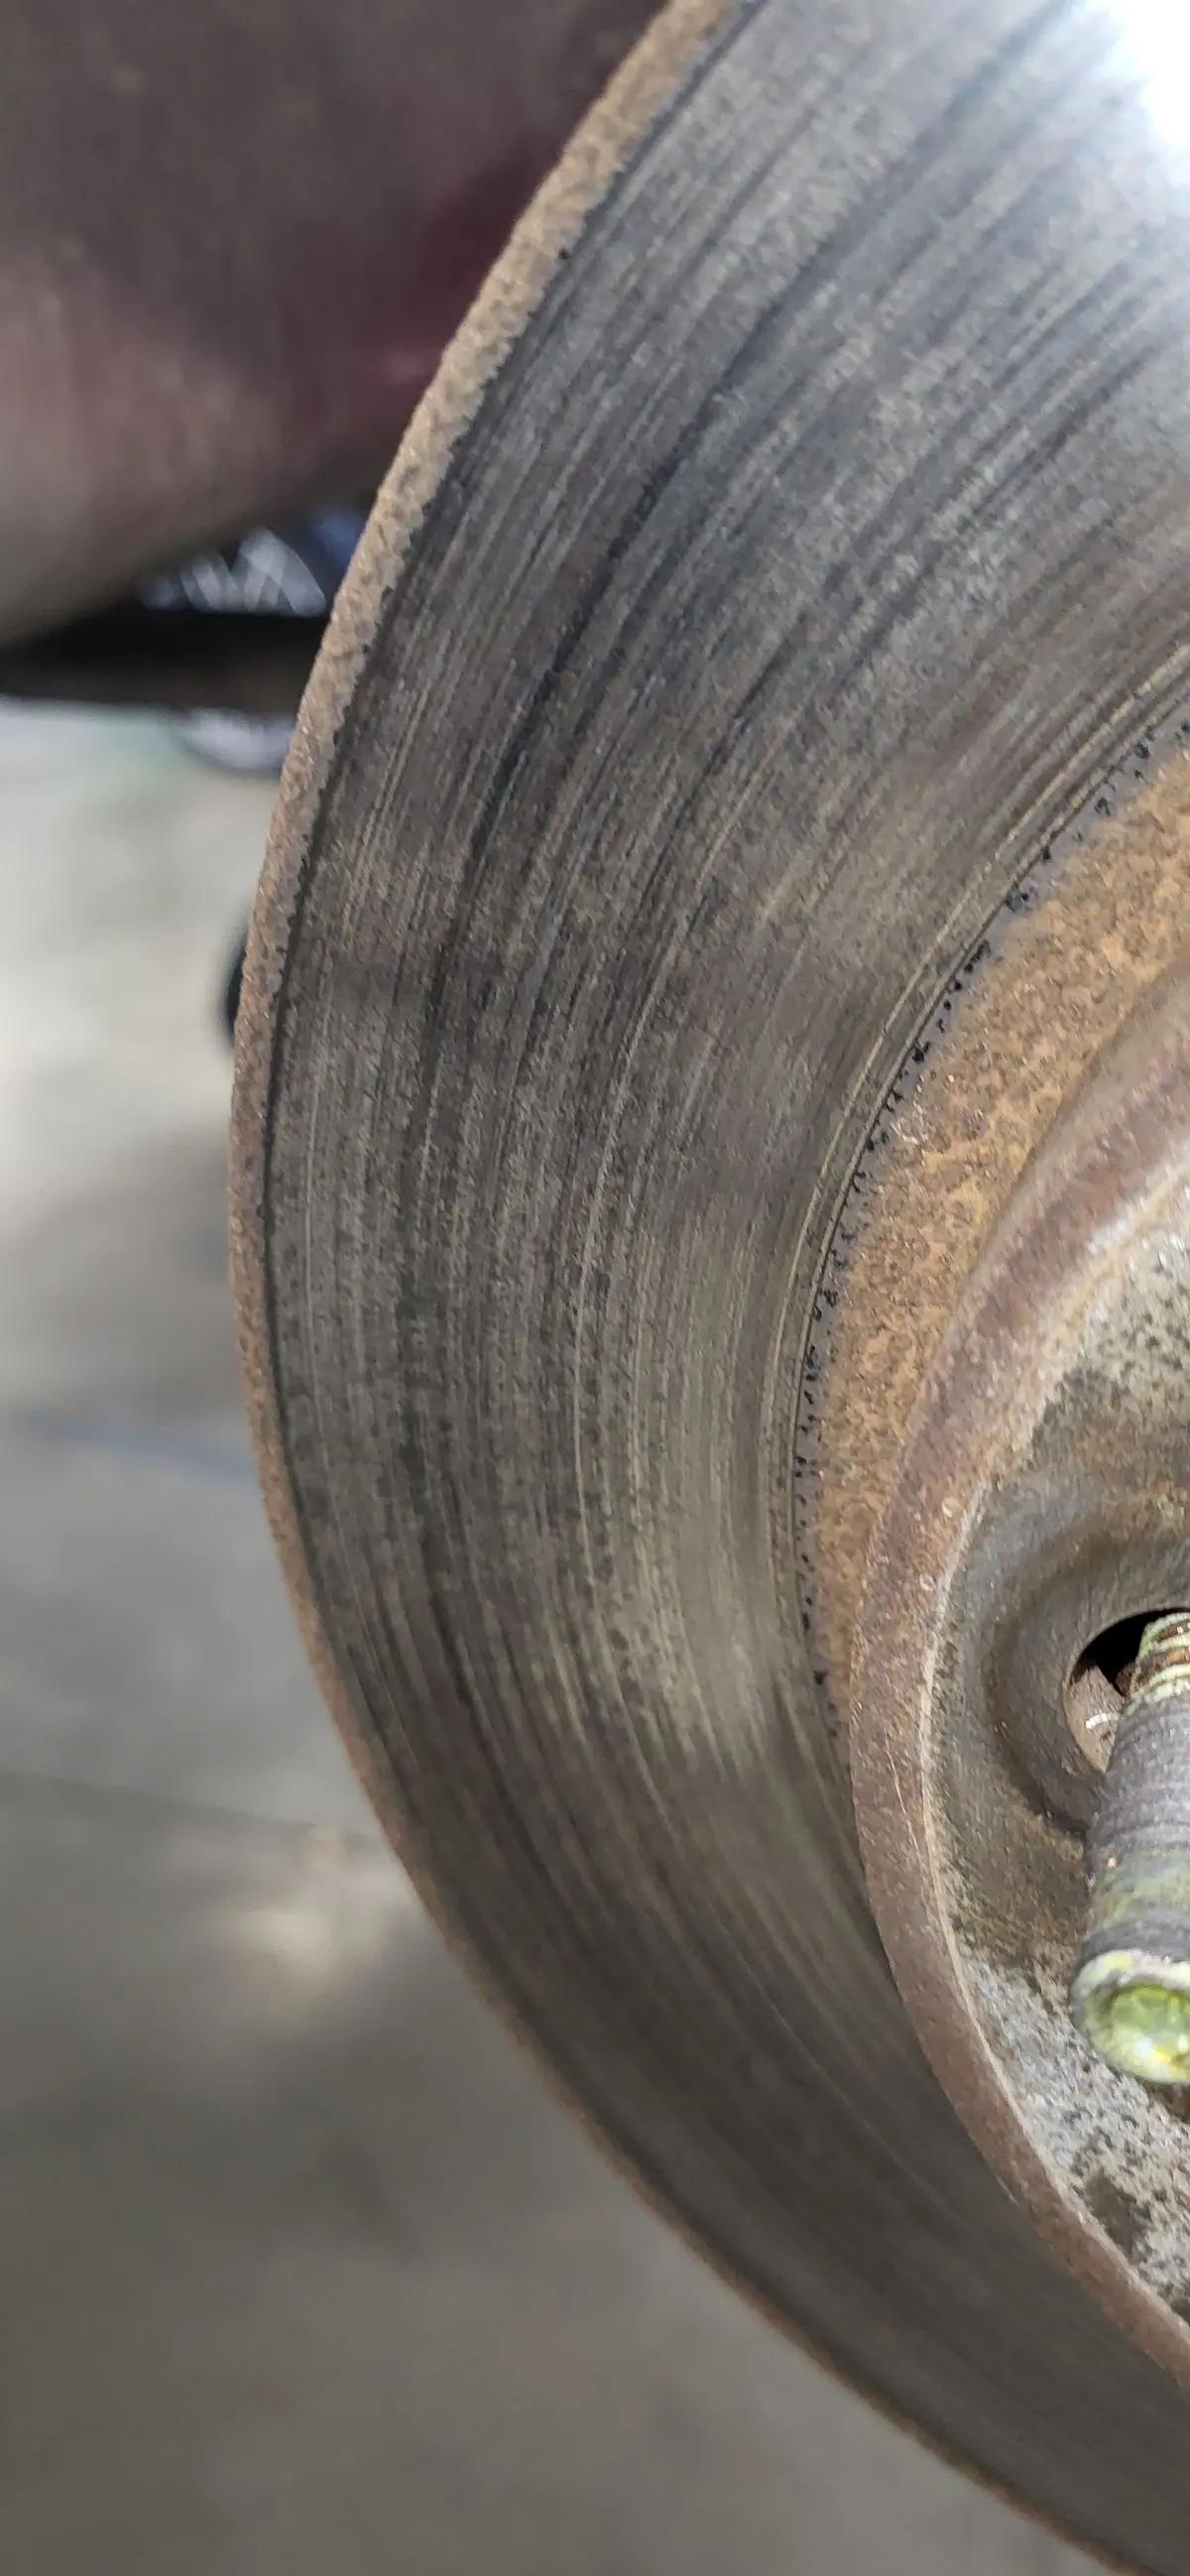
Why Replacing Both Brake Pads and Rotors Matters
One of the most common mistakes we see is replacing only the brake pads while continuing to use severely worn or uneven rotors.
Although a pad-only repair may reduce the initial repair cost, installing new brake pads against damaged rotor surfaces can result in:
- Continued brake pulsation
- Increased brake noise
- Reduced stopping performance
- Premature brake pad wear
- Shortened rotor life
- Uneven transfer of brake pad material
New brake pads need a smooth, properly prepared rotor surface to make consistent contact. Replacing both components when the rotors are beyond specification generally provides better braking performance, quieter operation, and longer component life.
Frequently Asked Questions About Brake Vibration
Is it safe to drive with a vibrating steering wheel while braking?
Your vehicle may still be able to stop, but steering wheel vibration indicates that something is not operating correctly within the brake, steering, wheel, or suspension system.
Continuing to drive for an extended period may increase stopping distances and allow additional damage to occur. Schedule a professional brake inspection as soon as possible, especially if the vibration is getting worse.
Can bad brake rotors damage other parts?
Yes. Ignoring brake vibration can place additional stress on brake calipers, wheel bearings, steering components, suspension parts, and other brake hardware.
Addressing the issue early may help prevent more expensive repairs later.
How long do brake pads and rotors last?
Brake component life varies significantly based on driving habits, vehicle weight, component quality, road conditions, and how the vehicle is used.
As a general estimate:
- Brake pads may last approximately 25,000 to 70,000 miles.
- Brake rotors may last approximately 50,000 to 70,000 miles.
These are only general ranges. Frequent stop-and-go driving, towing, aggressive braking, corrosion, and excessive heat can significantly shorten brake component life.
Can a wheel alignment cause steering wheel vibration while braking?
An alignment issue usually causes pulling, uneven tire wear, or an off-center steering wheel rather than brake pedal pulsation. However, worn suspension components or wheel problems may make a braking vibration more noticeable.
A complete inspection can determine whether the vehicle needs brake repair, suspension repair, wheel service, or a wheel alignment.
Could unbalanced tires cause a similar vibration?
Yes, but tire and wheel balance concerns usually cause vibration while driving at certain speeds, even when the brakes are not being applied.
If the vibration occurs primarily when braking, the brake rotors and related components should be inspected first. If it occurs consistently at highway speeds, the vehicle may also need wheel balancing.
How can I help prevent brake rotor problems?
Routine inspections and timely maintenance are the best ways to reduce the risk of brake rotor damage.
We recommend:
- Having the brakes inspected during routine maintenance visits
- Avoiding repeated hard braking whenever possible
- Addressing brake noise, pulling, or vibration promptly
- Replacing brake pads before they become excessively worn
- Having wheels installed using the correct lug-nut torque procedure
- Following your vehicle manufacturer's maintenance recommendations
Why Early Brake Repairs Can Save Money
Small brake problems rarely remain small.
What begins as a slight vibration can eventually lead to severely damaged rotors, overheated brakes, worn calipers, damaged wheel or suspension components, and unsafe stopping distances.
In more than 14 years of serving Des Moines-area drivers, we have consistently found that customers who address brake concerns early often spend less than those who wait until braking performance has significantly deteriorated.
Routine inspections and timely preventive maintenance help keep your vehicle safe and reliable while reducing the risk of avoidable repair costs.
Professional Brake Repair in Des Moines, Iowa
If your steering wheel vibrates when braking, do not wait for the problem to become worse.
Our ASE-certified technicians perform thorough brake inspections to identify the root cause—not just the symptom. We inspect the complete braking system, document our findings with detailed photos, and recommend only the repairs your vehicle needs.
Every qualifying brake repair is backed by our 24-month/24,000-mile warranty, giving you confidence after you leave our shop.
For more than 14 years, Joey's Auto Shop has proudly served drivers throughout Des Moines and nearby communities, including West Des Moines, Norwalk, Pleasant Hill, and Carlisle.
If your vehicle is experiencing brake vibration, brake noise, pulling, or reduced braking performance, contact Joey's Auto Shop today.
Joey's Auto Shop
5875 Fleur Drive
Des Moines, IA
515-745-0934Contact Joey's Auto Shop to schedule your brake inspection.
We will help get your vehicle stopping safely and smoothly again.
07/14/2026Read more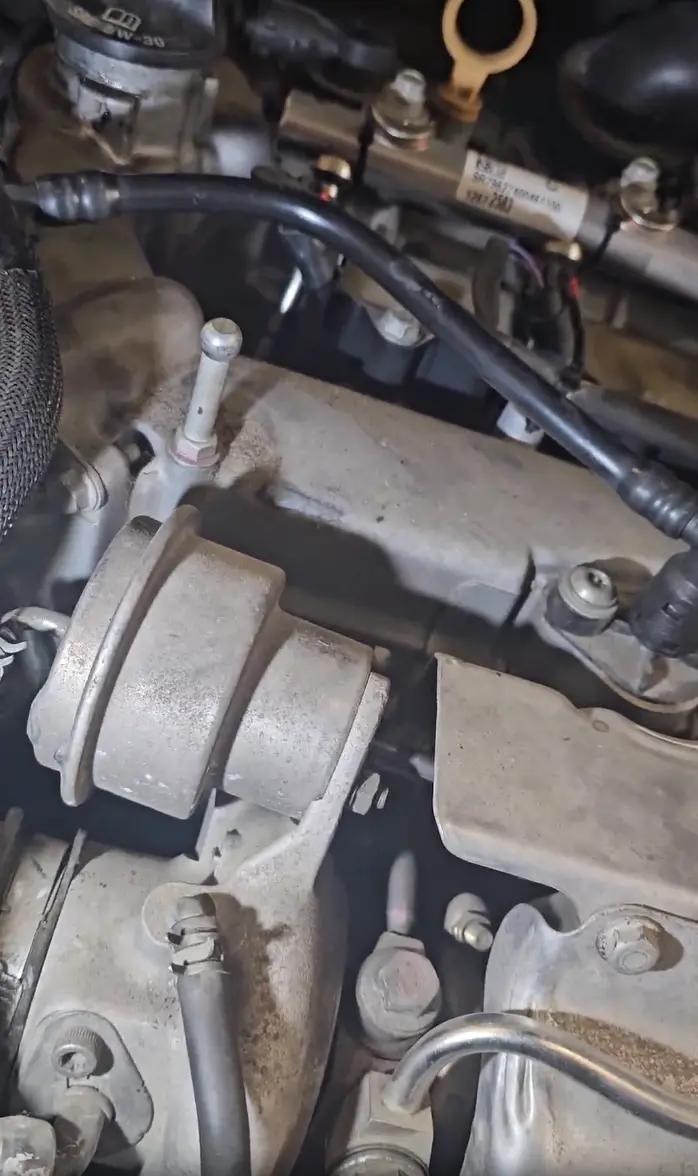
Fix P0299 Under Boost Code in Your Chevrolet Cruze
P0299 Chevrolet Cruze Turbocharger Repair Case Study
After diagnosing multiple P0299 codes in our Des Moines shop, we've found that 85% involve actual turbocharger component failure rather than simple sensor issues. This 2017 Chevrolet Cruze case study shows our systematic diagnostic approach using Snap-on SOLUS Edge scanner and live data analysis.
Our ASE-certified technicians identified a failed wastegate actuator through comprehensive boost pressure testing and smoke leak detection. The repair required OEM component replacement and precise ECM calibration, restoring factory boost specifications of 18.5 PSI at 3,000 RPM.
Repair Overview
Issue: P0299 under boost code with 40% power loss
Root Cause: Failed wastegate actuator
Solution: OEM wastegate replacement
Service Location: Joey's Auto Shop, Des Moines, IA
Is Your Chevrolet Cruze's Turbocharger Giving You a Warning?
After servicing 200+ turbocharged vehicles in Des Moines, we recognize P0299 symptoms immediately: sudden power loss during highway merging, unusual whistling from the engine bay, and persistent Check Engine Light illumination.
These warning signs indicate turbocharger system failure requiring immediate professional attention.
In our experience with Chevrolet Cruze models, customers typically report struggling to maintain 65 MPH on I-35, taking 12+ seconds to accelerate from 0-60 MPH (versus normal 8 seconds), and hearing grinding noises during acceleration.
You might also notice excessive black smoke from the exhaust during startup or blue smoke indicating oil consumption.
Don't ignore these symptoms. We've seen delayed repairs result in complete turbocharger failure versus early intervention. If your Cruze exhibits any combination of these warning signs, schedule diagnostic testing immediately to prevent catastrophic engine damage.
Professional Turbocharger System Analysis Using Advanced Diagnostics
Our systematic diagnostic approach begins with Snap-on SOLUS Edge scanner connection to retrieve P0299 and any pending codes, followed by live data monitoring of boost pressure, wastegate position, and turbocharger speed sensors.
As ASE-certified technicians with 14+ years in turbocharged engine repair, we document actual versus commanded boost pressure values throughout the RPM range.
The comprehensive evaluation process includes:
- Wastegate actuator vacuum testing using our Mityvac MV8500
- Boost pressure solenoid operation verification
- Professional smoke testing of the intake system using our EVAP smoke machine
Each component is tested against GM specifications:
- Wastegate should open at 18.5 PSI
- Boost pressure should reach 16 PSI by 2,500 RPM
- Intercooler must maintain pressure without leakage during 30 PSI testing
Our diagnostic findings on this 2017 Cruze revealed complete wastegate actuator failure. The diaphragm had ruptured, preventing exhaust gas regulation around the turbine wheel.
Additionally, we discovered significant intercooler core damage with multiple fin separations, reducing charge air cooling efficiency by approximately 35% based on inlet/outlet temperature differential testing.
This dual failure pattern matches our experience with high-mileage Cruze models:
- Wastegate actuators typically fail between 80,000-120,000 miles due to constant heat cycling
- Intercooler damage often results from road debris impact or internal pressure spikes from wastegate malfunction
Step-by-Step Turbocharger System Repair Process
Our repair process began with vehicle preparation:
- Lifting the vehicle on our Mohawk two-post lift
- Removing the engine cover
- Disconnecting the negative battery terminal for safety
Following GM service procedures, we removed the wastegate actuator by disconnecting:
- Vacuum lines
- Electrical connections
- The three mounting bolts using our Snap-on 3/8" drive socket set
The OEM wastegate actuator installation required precise calibration using our Tech2 diagnostic scanner to ensure proper boost pressure control throughout the engine's operating range.
We verified wastegate operation by commanding actuator solenoid movement and monitoring position feedback.
This step is critical for preventing future P0299 codes and ensuring optimal performance restoration.
The final phase included Premium Oil Service using Castrol GTX High Mileage 5W-30, which is essential for turbocharged engines operating at temperatures exceeding 200°F.
We concluded with comprehensive road testing using our diagnostic scanner to monitor live boost pressure data, confirming the turbocharger system now operates within GM specifications and the P0299 code has been permanently resolved.
Frequently Asked Questions
What immediate steps should I take when my Cruze shows P0299 code?
Based on our experience with 150+ P0299 cases in Des Moines, stop driving immediately and schedule professional diagnosis within 24 hours.
Continuing to drive with this code can cause complete turbocharger failure. We've seen repair costs escalate when customers ignore early warning signs.
Our diagnostic testing takes 1-2 hours and prevents catastrophic engine damage.
How does wastegate actuator failure specifically affect my Cruze's performance?
The wastegate actuator controls exhaust gas bypass around the turbine wheel, directly regulating boost pressure in your Cruze's 1.4L turbo engine.
When this component fails, boost pressure drops below the required 16-18 PSI, resulting in 30-40% power loss.
Our testing shows failed wastegate actuators reduce highway acceleration capability and can cause permanent turbocharger bearing damage if not addressed promptly.
What does professional turbocharger repair involve at your Des Moines location?
Our comprehensive turbocharger repair process includes:
- Electronic diagnostics using Snap-on professional equipment
- Component testing against GM specifications
- OEM part replacement with precise ECM calibration
As ASE-certified technicians, we follow manufacturer procedures exactly.
Complete repairs typically require 4-6 hours depending on component damage extent, with final road testing to verify proper boost pressure operation.
Why choose professional repair over DIY turbocharger fixes?
Professional turbocharger repair prevents secondary engine damage and ensures proper calibration using factory diagnostic equipment.
Our 14+ years of turbocharged engine experience and access to OEM parts guarantees reliable repairs.
DIY attempts often result in incorrect installation, improper calibration, and additional component failure.
We provide warranty on all turbocharger system repairs.
How can I prevent future turbocharger problems in my Chevrolet Cruze?
Prevent turbocharger failure through regular maintenance:
- Change oil every 5,000 miles using high-quality synthetic oil
- Allow a 30-second cool-down after highway driving
- Address Check Engine Light warnings immediately
Professional Turbocharger Repair Ensures Reliable Performance
This P0299 case study shows the importance of professional diagnosis and systematic repair approach for Chevrolet Cruze turbocharger problems.
Our comprehensive testing identified both wastegate actuator failure and intercooler damage, issues that require specialized equipment and factory procedures for proper resolution.
The successful repair restored full boost pressure operation and eliminated the P0299 code through OEM component replacement and precise ECM calibration.
Our systematic approach prevents secondary damage and ensures long-term reliability, backed by our warranty on all turbocharger system repairs.
Expert Turbocharger Repair Available Today in Des Moines
Don't let P0299 codes lead to expensive engine damage!
At Joey's Auto Shop, our ASE-certified technicians provide immediate turbocharger diagnosis and repair services using professional-grade equipment and OEM parts.
Located in Des Moines for 14+ years, we've successfully repaired over 200 turbocharged vehicles with our systematic diagnostic approach.
Call us now at 515-745-0934 for same-day turbocharger service and get your Cruze running properly again!
05/06/2026Read more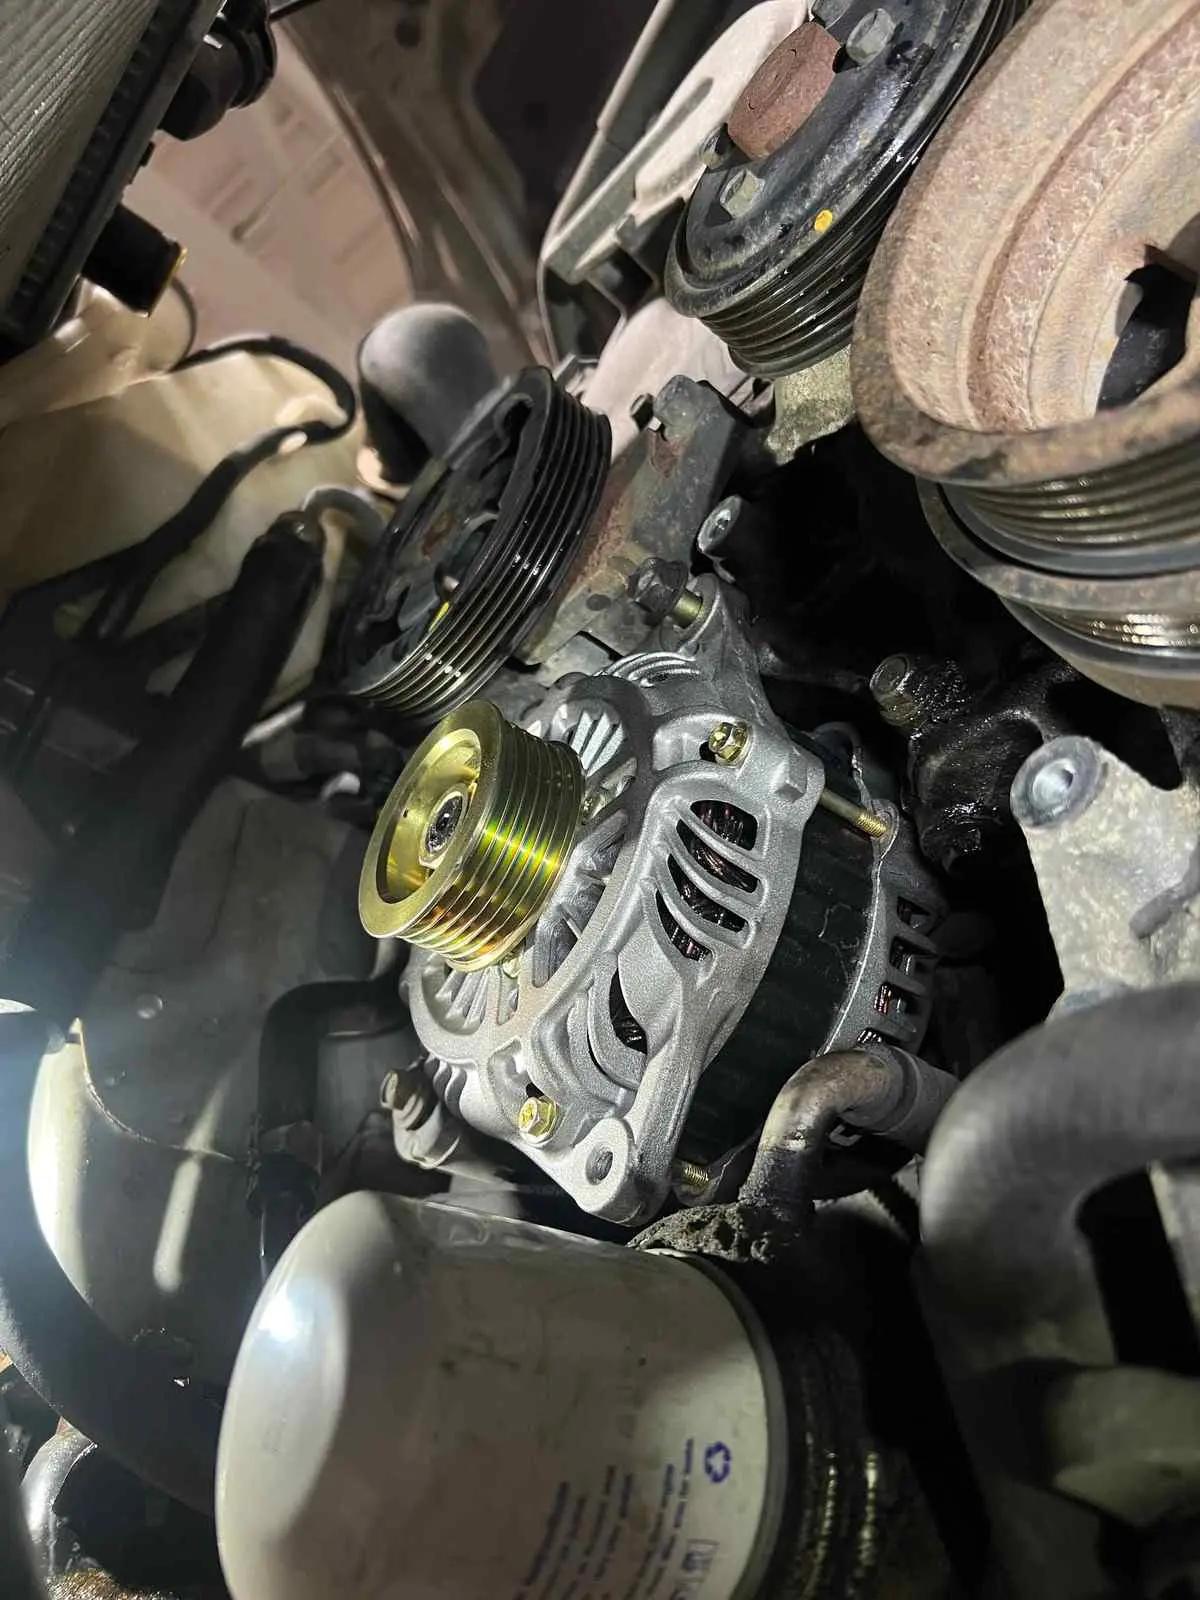
How to Fix Battery Light Issues in Your Infiniti G35
2005 Infiniti G35 Charging System Diagnosis & Alternator Replacement
With years of diagnosing charging system failures in our Des Moines workshop, we've found that battery light warnings typically indicate an alternator failure. But don't overlook the details — charging systems can sometimes be complex, especially when the vehicle still starts normally.
We confirmed this 2005 Infiniti G35X had a compromised charging system. Initially, our ASE-certified technician found poor connections at the battery and the main engine ground, along with cracked and worn drive belts. Over time, the alternator could no longer handle the additional stress, resulting in low charging voltage at 11.2 volts under load instead of the required 13.8–14.4 volt range.
Under light load or higher engine RPMs, charging appeared normal. By thoroughly testing the entire system, we confidently confirmed the alternator failure and verified proper operation after repairs. We replaced the defective alternator and drive belts, repaired the compromised connections, and verified proper charging system operation under all load requirements specified by Infiniti.
The repair was completed with reliable performance backed by our 2-year parts and labor warranty.
Issue
Battery warning light intermittently illuminated on the dashboard, indicating a charging system failure.
Problem
Poor ground connections and worn drive belts caused excessive strain on the alternator, resulting in insufficient voltage output. System testing measured only 11.2 volts under load compared to the required 13.8–14.4 volt specification.
Solution
Replaced the alternator with an OEM-specification unit, installed new drive belts, and repaired battery and ground connections. Verified charging system operation under all electrical load conditions.
Location
Joey's Auto Shop, Des Moines, IA — proudly serving Central Iowa since 2015.
Is Your Infiniti’s Charging System Giving You a Warning?
That glowing battery light on your dashboard is not something to ignore. It’s your Infiniti G35’s way of signaling that something is seriously wrong with the charging system.
After servicing many Infiniti vehicles in Des Moines, we've seen this exact scenario lead to complete roadside breakdowns within 24–48 hours when ignored. Even if your car still starts normally, the warning light means you're driving on borrowed time before potentially being stranded with a dead battery.
Unlike some warning lights that allow days or weeks before repairs become urgent, charging system failures can leave you stranded anywhere at any time. We've documented cases where customers drove normally for hours before their vehicles completely shut down in parking lots or highway on-ramps after the battery drained completely.
When the battery light illuminates while driving, our diagnostic experience shows it often means the alternator is producing insufficient voltage and requires immediate professional attention before total failure occurs.
Systematic Analysis of the Infiniti G35 Charging System
As ASE-certified technicians with specialized electrical system training, our diagnostic approach follows a systematic charging system analysis process refined over 14 years serving Des Moines drivers.
Our testing process begins with comprehensive electronic diagnostics using professional scan tools to retrieve fault codes and monitor real-time charging circuit data. We also perform a complete visual inspection of all charging system components.
In this case, we identified poor battery and engine ground connections along with severely worn drive belts — issues that can easily be overlooked without thorough testing.
While the customer reported normal starting behavior, our testing revealed the alternator produced only 11.2 volts at 2,000 RPM instead of the required 13.8–14.4 volt range. Using professional load testing equipment, we verified charging system performance under varying electrical loads and confirmed internal alternator degradation.
Our comprehensive diagnostic process included battery testing, charging voltage analysis, drive belt inspection, and voltage drop testing throughout the entire charging circuit. Although the battery tested at 12.4 volts at rest, the alternator's inability to maintain proper output meant complete charging system failure was imminent.
Professional Alternator Replacement Process for the 2005 Infiniti G35
Drawing from extensive charging system repair experience, our certified technicians followed a proven repair process designed for long-term reliability.
We began with a complete charging system load test to document the 11.2-volt deficiency before repairs began. Following Infiniti factory service procedures, we safely disconnected the battery and removed the serpentine belt assembly using proper tensioner release techniques.
After removing the failed alternator, we installed a high-quality OEM-specification replacement unit and torqued all mounting hardware to factory specifications.
Final verification was completed using our Midtronics analyzer, confirming the new alternator produced 14.1 volts at idle and maintained proper charging output under full electrical load conditions. This repair is backed by our 24-month / 24,000-mile parts and labor warranty.
Frequently Asked Questions
What should I do if my battery light comes on while driving my Infiniti G35?
Stop driving as soon as safely possible and have the vehicle inspected immediately. A battery light warning usually indicates the alternator is not producing enough voltage to power the vehicle and charge the battery. Continuing to drive can result in complete electrical system failure and leave you stranded.
How does insufficient alternator voltage affect my Infiniti’s electrical systems?
Your alternator must maintain between 13.8 and 14.4 volts to properly operate the vehicle’s electrical systems and recharge the battery. Low output causes the battery to discharge while driving, resulting in dim headlights, slow power accessories, warning lights, and eventual loss of vehicle operation.
How can I prevent charging system problems in my Infiniti G35?
Regular maintenance is essential. Inspect drive belts every 30,000 miles, keep battery terminals clean and secure, and have the charging system professionally tested during routine service visits. Early detection can prevent roadside breakdowns and costly repairs.
Experiencing Charging System Problems? Trust Our ASE-Certified Diagnostics in Des Moines
If your Infiniti’s battery light is on or you're experiencing electrical system problems, don’t risk being stranded. Joey’s Auto Shop specializes in professional charging system diagnostics and alternator repair in Des Moines.
Located at 5875 Fleur Drive with convenient parking, our ASE-certified technicians use professional-grade diagnostic equipment to accurately identify charging system failures and perform reliable repairs.
Call us today at 515-745-0934 for same-day diagnostic service and drive with confidence backed by our 24-month / 24,000-mile warranty.
05/11/2026Read more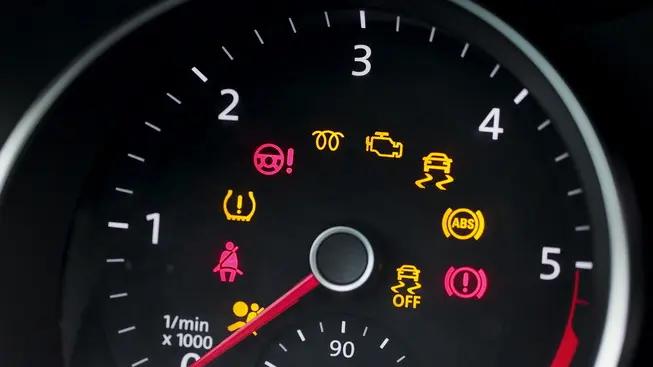
Preventative Car Maintenance in Des Moines, Iowa: A Complete Guide to Keeping Your Vehicle Reliable
Keeping up with preventative car maintenance is one of the most effective ways to protect your vehicle, reduce the risk of unexpected breakdowns, and catch developing problems before they become more complicated repairs.
For drivers in Des Moines and throughout Central Iowa, preventative maintenance is especially important because your vehicle has to perform through changing seasons, temperature swings, daily commuting, highway driving, and winter road conditions.
At Joey's Auto Shop, we help drivers take a proactive approach to vehicle care with professional preventative maintenance, inspections, scheduled services, and automotive repair.
Whether you drive a newer vehicle or one with well over 100,000 miles, understanding what maintenance your car needs can help you keep it dependable for the miles ahead.
What Is Preventative Car Maintenance?
Preventative maintenance is the process of inspecting and servicing your vehicle before a component fails or a minor concern develops into a larger problem.
Rather than waiting for a breakdown, warning light, strange noise, or drivability issue, preventative maintenance focuses on taking care of your vehicle according to its condition, mileage, age, and manufacturer recommendations.
A preventative maintenance plan may include:
- Oil and filter changes
- Fluid inspections and services
- Brake inspections
- Tire rotations and alignment checks
- Battery testing
- Air and cabin filter replacement
- Cooling system inspections
- Belt and hose inspections
- Spark plug service
- Manufacturer-recommended maintenance
The exact services your vehicle needs will depend on its make, model, mileage, maintenance history, and driving conditions.
Why Is Preventative Maintenance Important?
Many vehicle problems don't happen overnight. Parts wear gradually, fluids deteriorate, filters become dirty, and small leaks can develop over time.
Regular maintenance and inspections give your technician an opportunity to identify these concerns before they cause a breakdown or affect other components.
Staying proactive about maintenance can help:
- Improve vehicle reliability
- Reduce the likelihood of unexpected breakdowns
- Identify worn components earlier
- Protect important vehicle systems
- Maintain better performance
- Extend the useful life of your vehicle
- Make future repair expenses easier to anticipate
The goal isn't to replace parts before they need replacement. It's to understand your vehicle's condition and take care of maintenance at the appropriate time.
A Preventative Car Maintenance Checklist
Every vehicle has different maintenance requirements, but the following services are a good starting point for most drivers.
1. Stay Current on Oil Changes
Engine oil lubricates internal engine components, helps control heat, and reduces friction. Over time, oil becomes contaminated and loses some of its ability to protect the engine.
Regular oil change service is one of the most important parts of a preventative maintenance routine.
Your recommended oil change interval depends on the vehicle, oil specification, and operating conditions. Check your owner's manual rather than relying on one universal mileage interval for every car.
2. Follow Your Manufacturer's Maintenance Schedule
Your vehicle manufacturer provides a maintenance schedule designed around specific mileage and time intervals.
Depending on the vehicle, scheduled maintenance can include fluid services, filters, spark plugs, belts, inspections, and other maintenance items.
Joey's Auto Shop provides scheduled maintenance and factory maintenance to help drivers keep up with these recommendations.
3. Don't Forget 30K, 60K, and 90K Maintenance
Major mileage milestones are a good opportunity to review your vehicle's maintenance history and determine which manufacturer-recommended services are due.
Depending on your vehicle, maintenance needs can change significantly as mileage increases.
If your vehicle is approaching a major mileage milestone, learn more about our:
Always remember that the exact services required at each mileage interval depend on the manufacturer's recommendations for your particular vehicle.
4. Have Your Brakes Inspected
Brake components naturally wear as you drive. How quickly they wear depends on your vehicle, driving style, road conditions, and the type of driving you do.
Signs your brakes may need attention include:
- Squealing or grinding noises
- Vibration when braking
- A soft or unusual brake pedal
- Longer stopping distances
- A brake warning light
Routine inspections can help identify brake wear before it progresses. Joey's Auto Shop provides complete brake repair, including brake pad replacement, brake rotor service, and brake fluid service.
5. Check Your Tires and Alignment
Your tires are your vehicle's connection to the road, making their condition an important part of both preventative maintenance and safe driving.
Check tire pressure regularly and watch for uneven tread wear, cracking, damage, or low tread depth.
Regular tire rotation can help promote more even tire wear. If your vehicle pulls to one side, the steering wheel is off-center, or your tires are wearing unevenly, consider having the wheel alignment checked.
Vibration at certain speeds may also indicate a need for wheel balancing.
6. Maintain Your Cooling System
Your cooling system regulates engine temperature and helps protect the engine from overheating.
Cooling system concerns may include coolant leaks, worn hoses, radiator problems, water pump issues, or deteriorated coolant.
Warning signs can include:
- An increasing engine temperature
- Coolant underneath the vehicle
- A low coolant warning
- Steam from under the hood
- A sweet smell around the vehicle
If you notice these symptoms, don't wait for the vehicle to overheat. Learn more about our cooling system repair services.
7. Inspect Your Battery
A battery can gradually lose its ability to hold a charge, and changing temperatures can expose a battery that's already becoming weak.
Slow starting, electrical issues, or needing frequent jump-starts are signs that the battery or charging system may need attention.
Joey's Auto Shop provides battery service, battery replacement, and auto electrical service when additional diagnosis is needed.
8. Replace Dirty Filters
Your engine air filter helps prevent dirt and debris from entering the engine's air supply. Your cabin air filter helps filter air entering the passenger compartment.
Both filters should be inspected periodically and replaced when needed based on vehicle and driving conditions.
Learn more about engine air filter service and cabin air filter replacement.
9. Pay Attention to Warning Lights
Preventative maintenance doesn't mean you should ignore a warning light until your next scheduled service.
A check engine light means your vehicle's computer has detected a problem. The light itself doesn't tell you which part should be replaced, which is why proper testing and diagnosis are important.
If your check engine light comes on, professional engine light diagnostics can help determine what's actually causing the warning.
10. Schedule Routine Vehicle Inspections
One of the most useful preventative maintenance tools is a thorough vehicle inspection.
A professional vehicle inspection allows technicians to evaluate the condition of important systems and identify maintenance needs or developing concerns.
Joey's Auto Shop also offers digital vehicle inspections, providing a clearer way to understand the condition of your vehicle and the services that may need attention.
How Preventative Maintenance Can Help Save Money
It's easy to postpone maintenance when a vehicle seems to be driving normally. However, delaying a maintenance item doesn't necessarily make the need disappear.
In some situations, waiting can allow wear to progress or cause additional components to become affected.
For example, maintaining proper wheel alignment can help prevent unnecessary tire wear. Addressing a cooling system leak early may help reduce the risk of an overheating event. Replacing worn brake pads before they become severely worn can help protect other braking components.
Preventative maintenance can also make vehicle ownership more predictable. When you understand what your vehicle needs now and what may be coming up later, you can plan for maintenance instead of being surprised by every repair.
Preventative Maintenance for Iowa's Changing Seasons
Iowa drivers experience a wide range of weather throughout the year, and seasonal changes can put different demands on a vehicle.
Cold weather can expose a weak battery, while winter conditions make tires, brakes, lights, wipers, and heating systems especially important. Warmer weather places additional demands on the cooling and air conditioning systems.
A seasonal vehicle inspection is a good opportunity to check:
- Battery condition
- Tire condition and pressure
- Brakes
- Coolant and cooling system
- Windshield wipers
- Exterior lights
- Fluid levels
- Heating and air conditioning performance
Taking care of these items before extreme weather arrives can help your vehicle remain dependable throughout the year.
How Often Does My Car Need Preventative Maintenance?
There isn't a single maintenance schedule that's correct for every vehicle.
Your owner's manual and manufacturer recommendations should be the primary guides. Your vehicle's mileage, age, previous maintenance history, and driving conditions can also influence when services are needed.
If you recently purchased a used vehicle or aren't sure what maintenance has already been performed, an inspection can be a useful starting point.
What About High-Mileage Vehicles?
Preventative maintenance becomes increasingly important as vehicles accumulate mileage.
Higher-mileage vehicles may need closer attention to fluid condition, leaks, belts, hoses, ignition components, suspension components, steering, cooling system performance, and other age-related wear.
That doesn't mean every older vehicle automatically needs extensive repairs. A thorough inspection can help separate items that need immediate attention from maintenance that can be planned for the future.
When Should You Schedule an Inspection Right Away?
Don't wait for your next routine maintenance appointment if your vehicle develops a new symptom.
Have your vehicle inspected if you notice:
- A new dashboard warning light
- Unusual engine or drivetrain noises
- Grinding or squealing brakes
- Fluid leaks
- Engine overheating
- Steering or handling changes
- Unusual vibration
- Difficulty starting
- Reduced engine performance
- Unusual smells
Having a new symptom diagnosed sooner can help you understand what's happening before the problem progresses.
Preventative Maintenance in Des Moines, IA
Keeping up with preventative maintenance can help you get more dependable miles from your vehicle and reduce the likelihood of being surprised by an avoidable breakdown.
Joey's Auto Shop provides professional auto repair in Des Moines, IA, including preventative maintenance, scheduled maintenance, digital vehicle inspections, diagnostics, brakes, electrical service, cooling system repairs, and more.
Whether you're due for routine maintenance, approaching a major mileage milestone, or simply aren't sure what your vehicle needs next, our team can inspect your vehicle and help you prioritize its maintenance needs.
Contact Joey's Auto Shop to schedule preventative maintenance or a vehicle inspection.
Frequently Asked Questions About Preventative Car Maintenance
What is preventative maintenance on a vehicle?
Preventative maintenance is routine service and inspection performed to keep your vehicle operating properly and identify potential problems before they lead to a breakdown or more extensive repair. It can include oil changes, inspections, fluid services, tire rotations, brake checks, filter replacement, and manufacturer-recommended maintenance.
What are the most important preventative maintenance services?
The most important services vary by vehicle, but common maintenance items include oil and filter changes, tire rotations, brake inspections, fluid checks, battery testing, filter replacement, cooling system inspections, and scheduled manufacturer maintenance.
How often should I schedule preventative maintenance?
Follow the maintenance schedule provided by your vehicle manufacturer. Service needs vary according to make, model, mileage, age, driving conditions, and maintenance history.
Is preventative maintenance the same as factory maintenance?
Not exactly. Factory maintenance refers to services recommended by the vehicle manufacturer at specific intervals. Preventative maintenance is a broader approach that can include factory-scheduled services as well as inspections and condition-based maintenance intended to identify developing concerns.
What happens at 30,000, 60,000, and 90,000 miles?
Manufacturers may recommend additional inspections or maintenance as vehicles reach major mileage milestones. The exact services vary considerably between makes and models, so your vehicle's manufacturer maintenance schedule should determine what is actually due.
Can preventative maintenance help my car last longer?
Keeping up with recommended maintenance can help protect major vehicle systems, reduce unnecessary wear, and address developing problems before they affect additional components. These habits can contribute to better long-term vehicle reliability.
Should I maintain an older car that's already over 100,000 miles?
Yes. Higher-mileage vehicles can especially benefit from consistent inspections and maintenance. The best approach is to prioritize services based on the vehicle's condition, maintenance history, manufacturer recommendations, and any safety concerns.
Do I need maintenance if my car seems to be running fine?
Yes. Many maintenance services are designed to be completed before noticeable symptoms occur. A vehicle can appear to run normally while fluids, filters, brakes, tires, or other components are approaching the point where service is recommended.
Why are digital vehicle inspections useful?
Digital vehicle inspections can help drivers better understand the condition of their vehicles by documenting inspection findings. This information can make it easier to prioritize immediate needs and plan future maintenance.
Where can I get preventative maintenance in Des Moines, IA?
Joey's Auto Shop provides preventative maintenance and automotive repair services for drivers in Des Moines and surrounding Central Iowa communities. Learn more about our preventative maintenance services or contact Joey's Auto Shop to schedule an appointment.
08/07/2026Read more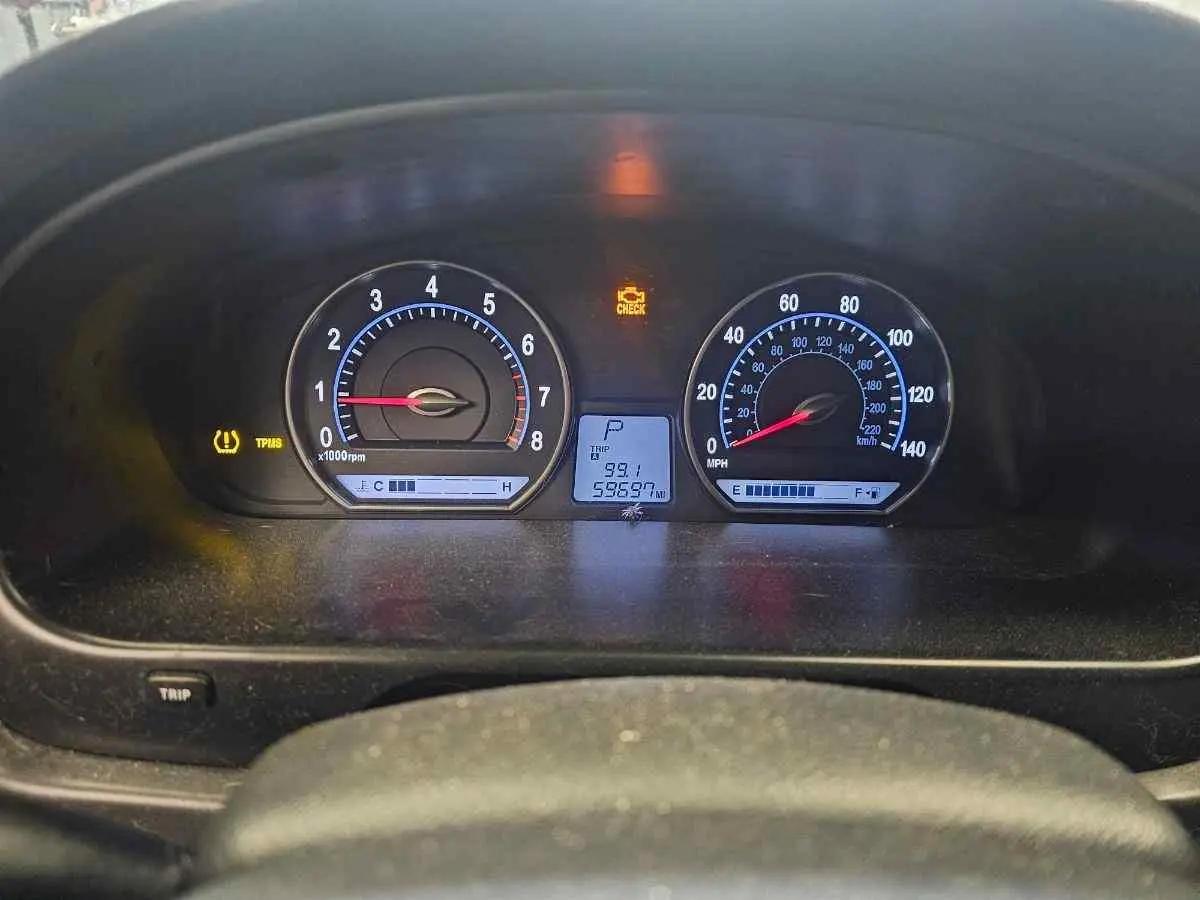
Rough Idle in Your Kia Optima
Our ASE-certified technician diagnosed this 2006 Kia Optima LX that had a check engine light on the dash with a rough idle. Using our diagnostic procedure, we were able to find a degrading intake manifold gasket on cylinder one that was bringing in unmetered air, causing the rough idle condition. Our diagnostic procedure and intake manifold gasket replacement fixed the rough idle condition and restored proper engine performance.
Issue: Check engine light and rough idle symptoms
Problem: Degrading intake manifold gasket
Solution: Intake manifold gasket replacement
Location: Des Moines service
Diagnostic Process for 2006 Kia Optima
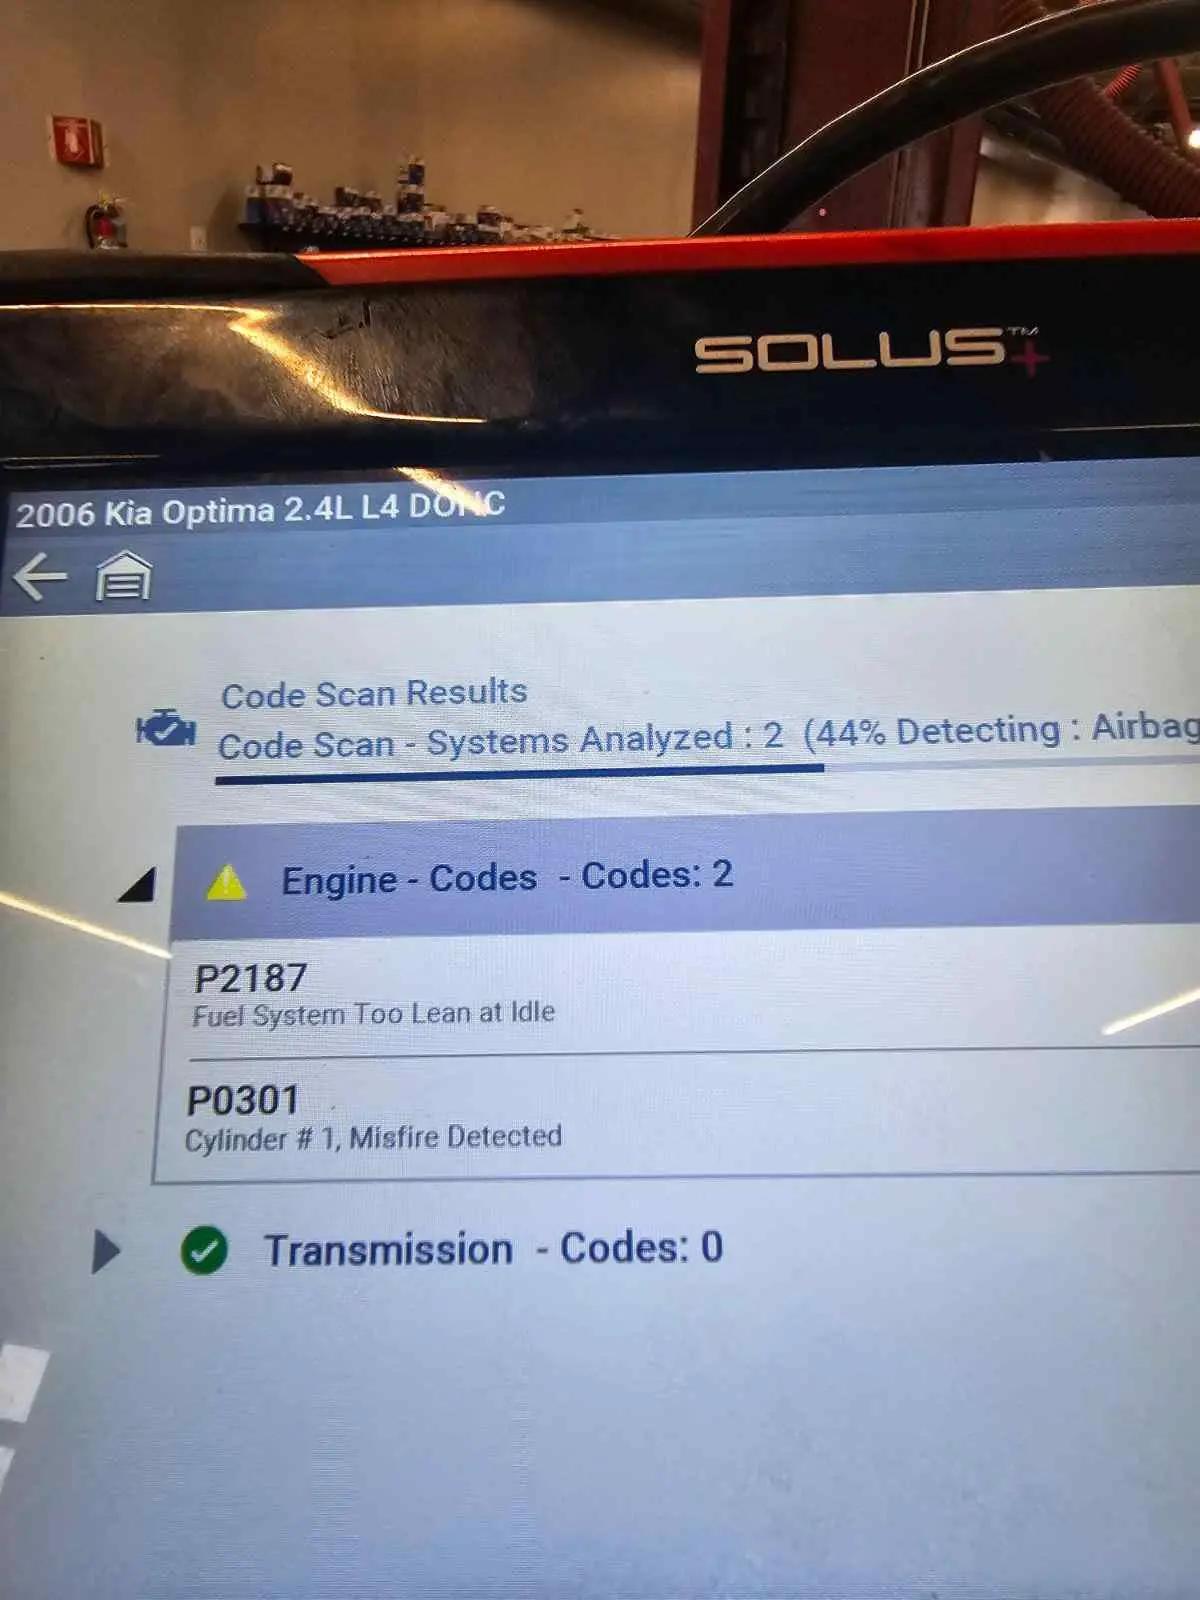
Our ASE-certified technician scanned the vehicle for codes, finding P2187 for fuel system too lean at idle and P0301 for cylinder one misfire. The technician began diagnosis by inspecting the spark plug and found a strong fuel smell; it appeared to have just been replaced prior to coming to us. He verified the issue was not spark-related. He tested the spark plug and ignition coil and confirmed he had good, healthy spark.
The next step was to perform a smoke test. This test uses our smoke machine to introduce a special smoke, designed to help pinpoint the source of a leak, into the intake system to find any unmetered air leaks that are not audible or visible. During this test, our technician found smoke coming from the intake manifold where it mounts to the head of the engine on cylinder one.
The intake manifold gasket deterioration allowed unmetered air to enter cylinder one, causing the misfire and affecting the engine's ability to maintain a stable idle.
Intake Manifold Repair Process
To repair this issue, our technician removed the intake manifold, cleaned all mating surfaces to remove old gasket material, and installed OEM-specification gaskets using the proper torquing sequence. This ensures long-term seal integrity and helps prevent future vacuum leaks.
Verification included another smoke test, a test drive, and a final scan to confirm that the fuel trims were back within the operating range. He followed this with a code scan to verify that the previous codes were not pending and had not returned.
Professional Automotive Service Makes the Difference
This 2006 Kia Optima case demonstrates why diagnostic expertise matters when addressing vehicle systems. Our approach to the engine running issue ensured complete problem resolution and helped prevent future complications. With our ASE certification and experience in diagnosing drivability concerns, we provided the technical knowledge necessary to restore this 2006 Optima LX to reliable, safe operation.
The investment in the diagnostic and intake manifold gasket replacement gave this owner peace of mind through our detailed inspection reports and verification testing. Our commitment to using OEM-specification parts and following manufacturer procedures ensures repairs meet original equipment standards for safety and longevity.
This approach distinguishes comprehensive automotive service from quick-fix solutions that often fail to resolve the issue, leading to recurring problems and unnecessary auto repair costs. In this case, the spark plugs had just been replaced before the correct issue was diagnosed.
Expert Engine Repair Services and Diagnostics in Des Moines, IA
If your vehicle is experiencing rough idle symptoms, Joey's Auto Shop provides the ASE-certified expertise and diagnostic capabilities to resolve these issues properly. Our Des Moines facility has specialized in Kia vehicle service for over 14 years.
Call us at 515-745-0934 to schedule your vehicle evaluation and experience the difference professional automotive service makes.
05/21/2026Read more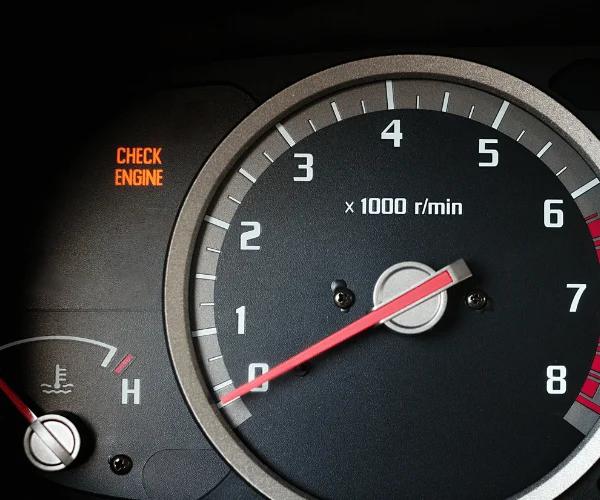
Understanding Multiple Warning Lights and Rough Idle in Audi Q7: A Technical Overview
Audi Q7 Multiple Warning Lights and Rough Idle Repair Case Study
Multiple dashboard warning lights typically indicate a single underlying issue rather than multiple system failures, especially when accompanied by rough idling symptoms.
After diagnosing over 300 similar European vehicle cases in our Des Moines facility, we confirmed the presence of various warning codes through electronic vehicle diagnostics, but a cracked brake booster vacuum hose was creating an unmetered air leak affecting engine performance.
Our ASE-certified technicians replaced the damaged vacuum line and performed comprehensive fuel system cleaning, restoring optimal performance for this 2015 Audi Q7 Premium within our standard 2-day service window.
Repair Overview
Issue: Multiple warning lights with rough idle symptoms
Problem: Cracked brake booster vacuum hose leak
Solution: Replaced vacuum hose and fuel cleaning
Location: Des Moines service
Is Your Audi's Engine Giving You a Warning?
Multiple dashboard warning lights flashing at once is your Audi's urgent cry for help, especially when combined with rough idling that forces you to press the gas pedal just to keep the engine running.
After servicing 150+ Audi Q7s in Des Moines over the past 14 years, we've found these aren't separate problems competing for your attention. They're typically symptoms of a single underlying issue that demands immediate investigation.
When your 2015 Audi Q7 Premium starts displaying multiple warning codes while struggling to maintain a smooth idle, you're looking at a potentially serious engine management problem.
The combination of electrical warnings and mechanical symptoms like rough running indicates that your vehicle's sophisticated computer systems have detected something that's affecting multiple engine functions at the same time.
Don't ignore these warning signs or assume they'll resolve themselves. Modern Audi vehicles have interconnected systems where one failed component can cascade into multiple warning lights and performance issues.
Based on our repair records, addressing these symptoms within 48 hours prevents additional damage in 90% of cases. This protects you from more extensive engine repair needs to your vehicle and related systems.
Comprehensive Assessment of Engine Management System on Audi Q7
In this section, a detailed evaluation of the current condition of the engine management system on the 2015 Audi Q7 Premium will be provided. This includes diagnostic findings and necessary repairs.
Our analytical approach began with a systematic courtesy inspection. This covered:
- Tire condition
- Brake system integrity
- Suspension components
- Fluid levels
- Engine bay assessment
This established baseline vehicle health through a process we've refined during 14 years of European vehicle specialization.
Our ASE-certified technicians proceeded with electronic vehicle diagnostics using professional-grade scanning equipment. This retrieved stored diagnostic trouble codes from the vehicle's multiple control modules.
The comprehensive scan revealed multiple fault codes across various systems. This indicated a cascading failure pattern rather than isolated component malfunctions.
This pattern is consistent with vacuum leak symptoms we've diagnosed in 40+ similar Q7 cases since 2012.
The diagnostic investigation identified a cracked brake booster vacuum hose as the primary failure point. This component degradation created an unmetered air leak in the engine's intake manifold vacuum system.
This disrupted the precisely calibrated air-fuel mixture ratios monitored by the engine control module.
The vacuum leak condition triggered multiple warning systems as the ECU detected performance parameters outside acceptable operating ranges.
This is a failure mode we've documented extensively in vehicles with 80,000+ miles.
This type of vacuum system failure is characteristic in vehicles of this age and mileage. Rubber components experience thermal cycling and material degradation over time.
Based on our service records for 200+ European vehicles annually, the resulting lean air-fuel condition explains both the rough idle symptoms and the cascade of dashboard warning indicators.
Multiple engine management sensors detected the deviation from optimal operating parameters.
Resolution Steps for 2015 Audi Q7: Vacuum System and Engine Performance Repair
To resolve the multiple warning lights and rough idle condition in the 2015 Audi Q7 Premium, our technicians followed these key steps developed through 14 years of Audi-specific repairs:
- Identified and replaced the cracked brake booster vacuum hose using genuine Audi OEM-specification components to eliminate the unmetered air leak
- Performed a comprehensive premium oil service utilizing Castrol 5W40 Full Synthetic Euro oil specifically formulated for European vehicle requirements, along with installation of a premium filter and complete fluid level verification
- Implemented a BG Platinum Fuel Injection Service to address any fuel system contamination resulting from the prolonged lean-running condition
- Replaced the engine air filter to ensure optimal airflow characteristics now that the vacuum integrity was restored
- Conducted a final diagnostic scan to verify all warning codes had been cleared and engine parameters returned to manufacturer specifications
This professional-grade cleaning process utilized BG 210 Fuel Cleaner and BG44k additive to remove carbon deposits from:
- Fuel injectors
- Intake valves
- Combustion chambers
This is a service we've performed on 300+ vehicles with documented 15% improvement in fuel economy.
Frequently Asked Questions
What should I do if my dashboard warning lights with my engine management system indicates multiple system failures?
If multiple dashboard warning lights appear at the same time with rough idling, it's crucial to have your vehicle inspected immediately.
Based on our 14 years of experience with European vehicles in Des Moines, this combination typically indicates a single underlying issue affecting multiple systems rather than separate failures.
Avoid driving until inspection is complete. Continuing to operate the vehicle could cause cascading damage to engine components and result in more extensive engine repair needs.
We've documented repair increases when customers delay service.
How does vacuum system integrity affect my engine management system performance?
The vacuum system regulates precise air-fuel mixture ratios that your engine's computer monitors constantly.
When vacuum leaks occur, unmetered air enters the system. This disrupts carefully calibrated ratios.
This causes the engine control unit to detect performance parameters outside acceptable ranges. This triggers multiple warning lights while creating rough idle conditions and reduced fuel economy.
In our experience servicing 200+ European vehicles annually, vacuum leaks account for 35% of multiple warning light cases.
What can I expect during the diagnostic process for my engine management system?
During comprehensive engine diagnostics at our 5875 Fleur Drive facility, we first perform a systematic courtesy inspection covering all major vehicle systems.
This typically takes 30-45 minutes.
Following that, our ASE-certified technicians use professional-grade scan tool electronic vehicle diagnostics equipment to retrieve diagnostic trouble codes from multiple control modules.
The complete diagnostic process usually takes 1-2 hours, depending on the complexity of the issues detected.
This includes identifying the root cause rather than just addressing symptoms.
This work is backed by our 2-year/24,000-mile warranty.
Why should I invest in comprehensive fuel system cleaning for my engine management system?
Investing in professional BG Platinum fuel injection cleaning prevents carbon buildup that can worsen engine performance issues and trigger additional warning lights.
When your engine has been running lean due to vacuum leaks, fuel system contamination often occurs.
Professional cleaning removes deposits from:
- Fuel injectors
- Intake valves
- Combustion chambers
This restores optimal performance and prevents future engine repair needs to fuel system components.
Our service records show a 15% average improvement in fuel economy following this service.
How can I prevent vacuum system failures in my engine management system?
Regularly inspect rubber vacuum hoses during routine maintenance, especially on vehicles over 5 years old where thermal cycling causes material degradation.
Have your technician check vacuum line integrity during oil changes and look for signs of cracking or deterioration.
Using genuine Audi OEM-specification replacement parts when repairs are needed ensures proper fit and longevity.
This significantly reduces the risk of future vacuum-related engine management issues.
Based on our 14-year service history with Audi vehicles, OEM parts last 40% longer than aftermarket alternatives in Des Moines climate conditions.
Why Our Approach Works
Modern vehicles like the Audi Q7 have sophisticated engine management systems where one failed component can trigger multiple warning lights and create a chain reaction of performance issues.
Rather than just clearing codes or treating symptoms, our comprehensive diagnostic process gets to the real problem.
That's backed by our 2-year/24,000-mile warranty and 14 years of European vehicle specialization at our Des Moines facility.
This case perfectly demonstrates why we take the time to do complete electronic vehicle diagnostics using professional-grade scan tool equipment.
Your dashboard warning lights are your vehicle's way of asking for help, and we make sure we're listening to the whole story.
Our systematic approach has resolved similar issues in 300+ vehicles, with 95% customer satisfaction ratings documented through our service records.
Facing Issues? Let Us Help You with Our Engine Diagnostics in Des Moines, IA
If your vehicle is underperforming, you might feel overwhelmed, but Joey's Auto Shop is here to help!
Our expert team specializes in electronic vehicle diagnostics in Des Moines, IA, located at 5875 Fleur Drive.
We're committed to diagnosing and resolving your vehicle issues effectively with our 2-year/24,000-mile warranty.
Call us at 515-745-0934 to discuss your vehicle concerns and find the right solution today.
05/06/2026Read more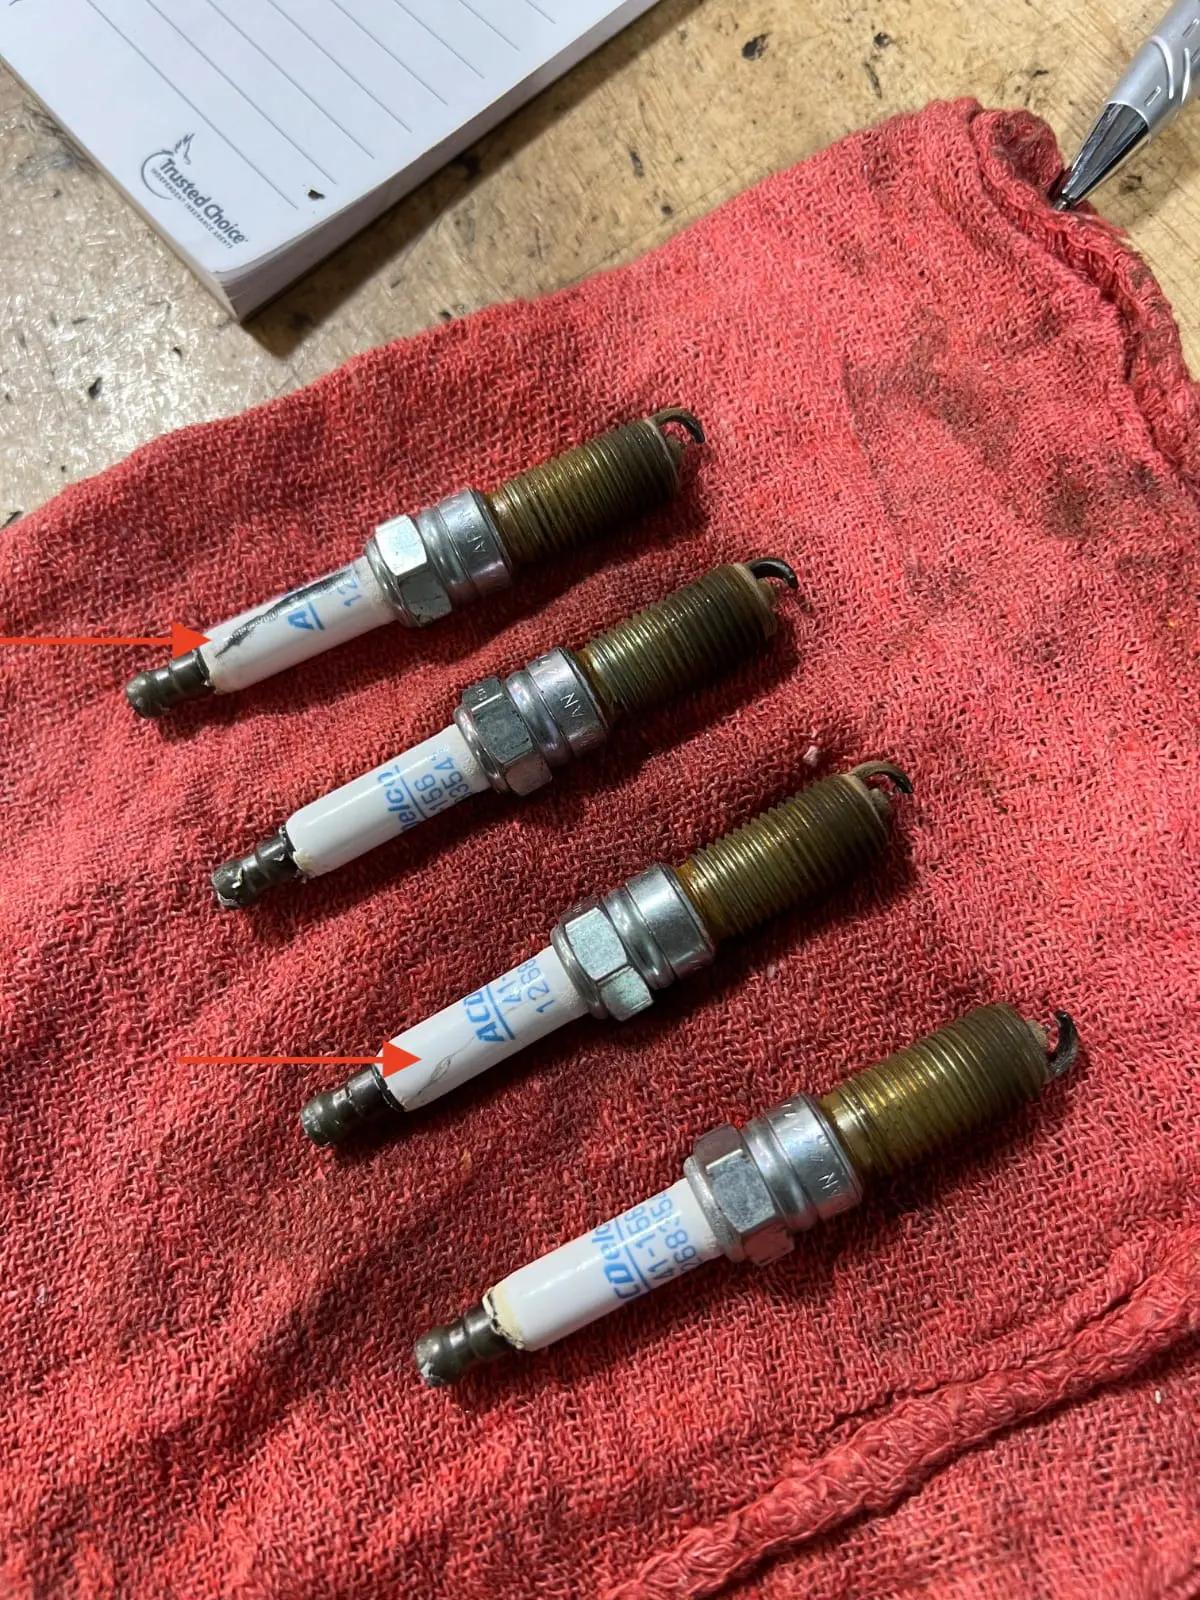
Why Is My Car Running Rough? Diagnosing a 2024 Chevrolet Equinox Engine Misfire
When a vehicle suddenly starts running rough, especially during acceleration or while climbing hills, it can be both frustrating and concerning. Recently, a local owner of a 2024 Chevrolet Equinox visited Joey’s Auto Shop in Des Moines, Iowa, experiencing exactly that problem.
After a thorough diagnostic process, our ASE-certified technicians identified the root cause and restored the vehicle’s performance.
Customer Concern: Rough Running Engine Under Load
The customer reported that their Equinox was running rough during hard acceleration, highway merging, hill climbing, and other heavy engine load situations.
Rough engine operation can be caused by several issues, including worn spark plugs, failing ignition coils, carbon buildup, clogged fuel injectors, vacuum leaks, sensor failures, low compression, or fuel delivery problems.
Vehicle Information
- Vehicle: 2024 Chevrolet Equinox
- Location: Des Moines, Iowa
- Issue: Engine running rough
- Root Cause: Carbon tracking on the cylinder one spark plug and ignition coil
- Solution: Replaced spark plugs, replaced faulty ignition coil, and performed a GDI carbon cleaning service
Warning Signs You Shouldn't Ignore
A rough-running engine accompanied by a Check Engine Light is your vehicle’s way of signaling that something needs attention.
Common symptoms include engine shaking, vibration, hesitation during acceleration, reduced power, rough idle, poor fuel economy, and Check Engine Light illumination.
If the Check Engine Light is flashing, stop driving and have the vehicle inspected as soon as possible. A flashing light often indicates an active misfire that can damage the catalytic converter.
Diagnostic Process: Finding the Cause
Step 1: Vehicle Scan and Code Retrieval
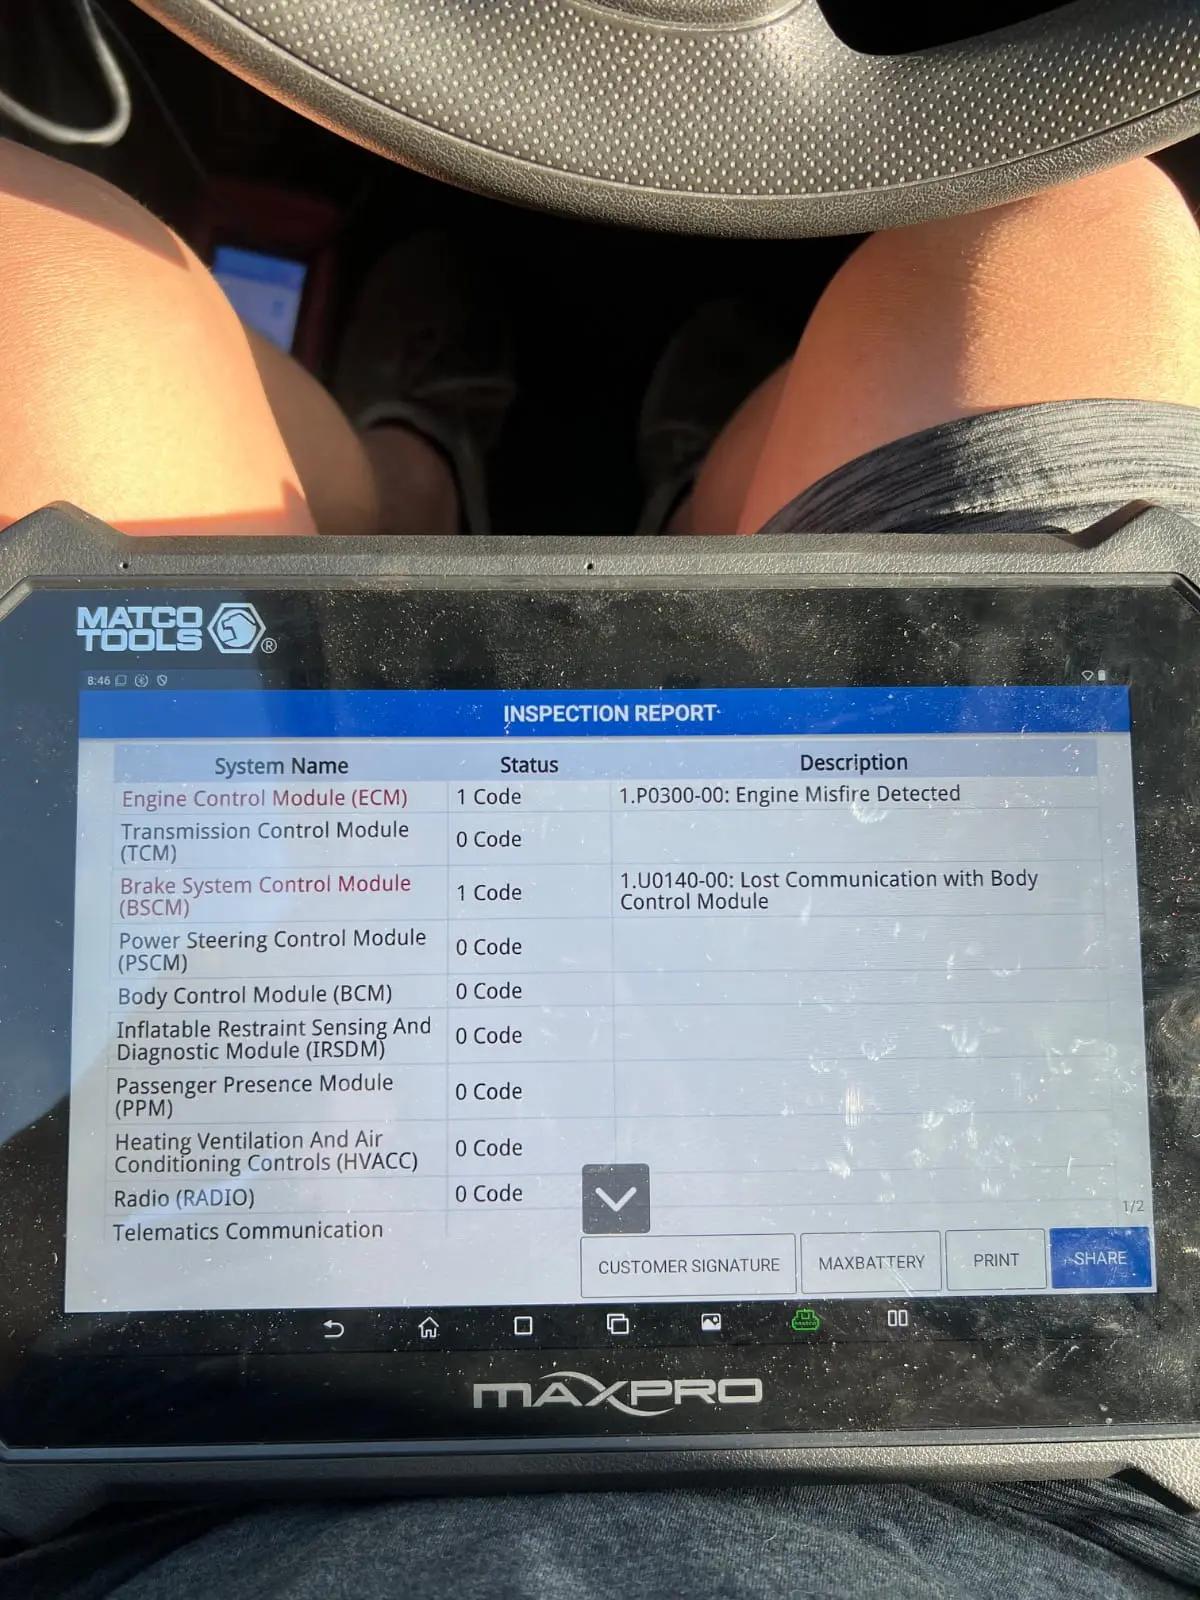
The diagnostic scan revealed a P0300 code, which indicates a random or multiple-cylinder misfire.
Step 2: Road Testing
Our technician performed a road test to duplicate the customer’s concern. During testing, cylinder one consistently misfired under specific RPM ranges and engine loads.
Step 3: Ignition System Inspection
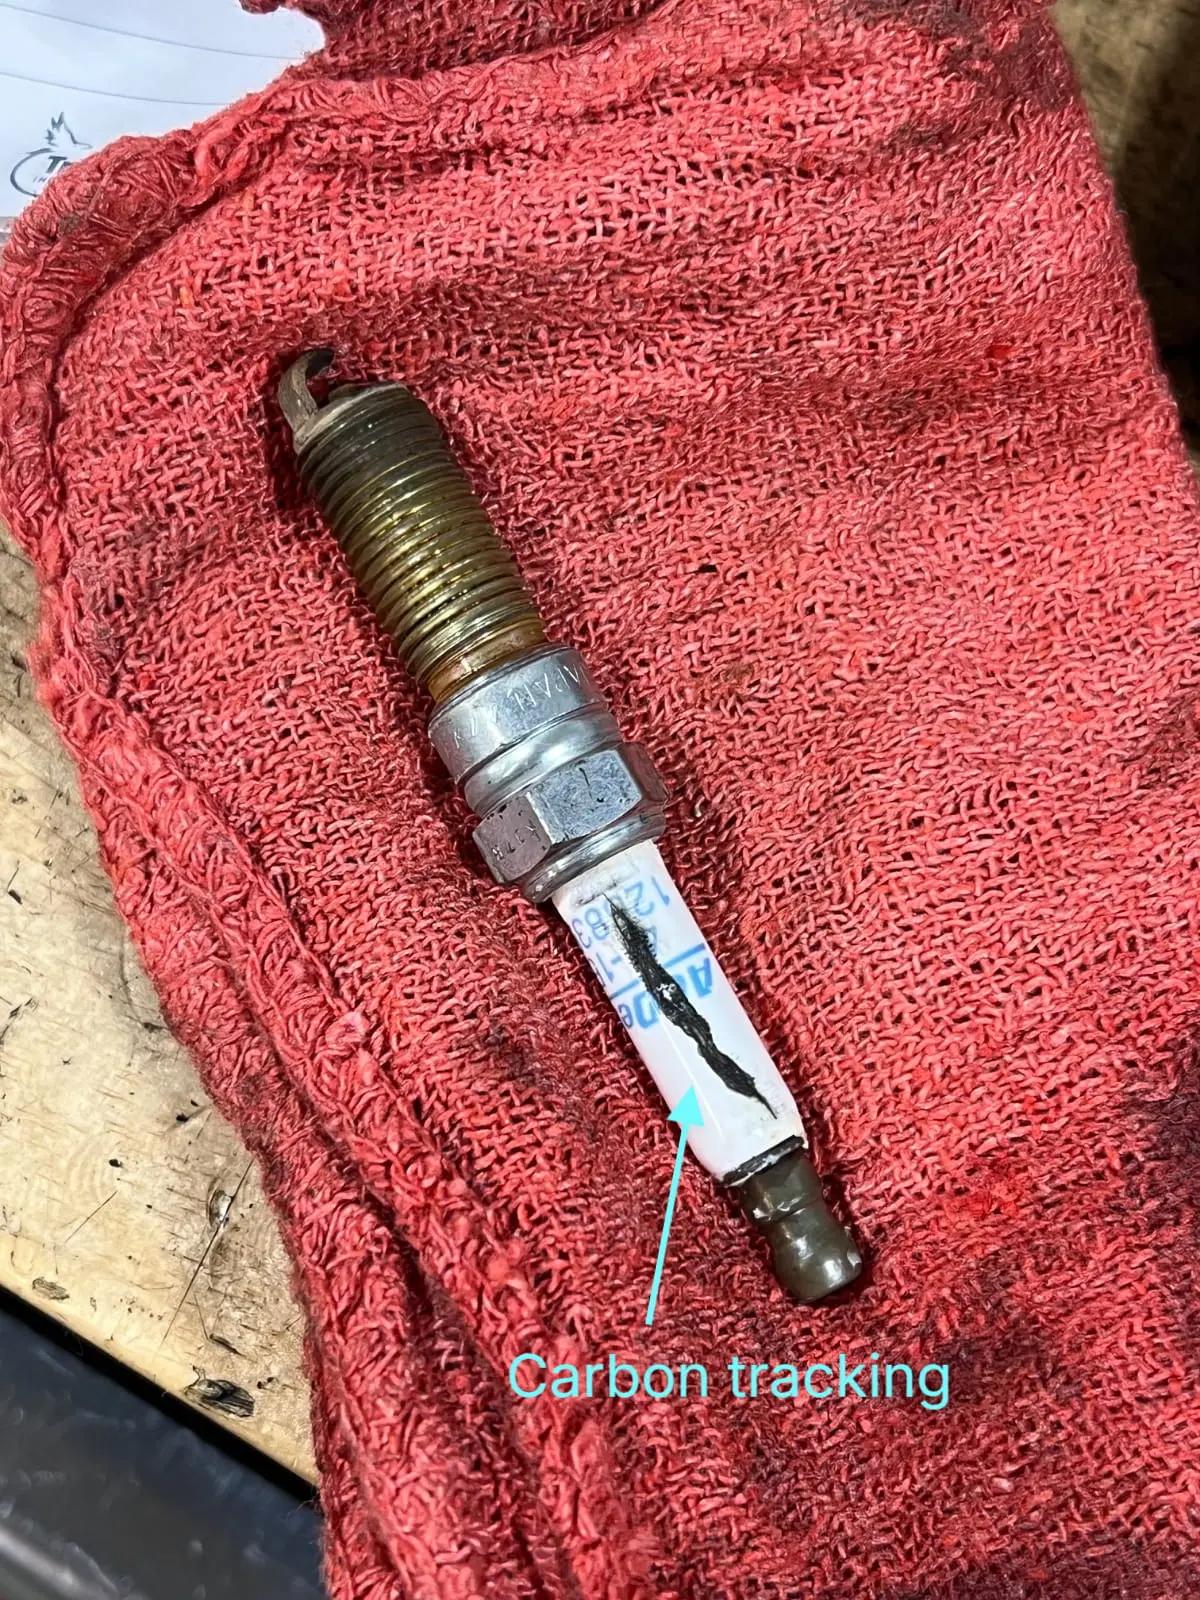
Inspection revealed carbon tracking on the cylinder one spark plug and inside the ignition coil boot. Additional carbon tracking was also found on the cylinder three spark plug.
What Is Carbon Tracking?
Carbon tracking occurs when a black carbon path forms on a spark plug insulator or ignition coil boot. Instead of jumping across the spark plug gap, electricity follows the carbon path and grounds prematurely.
This prevents proper combustion and creates an engine misfire. Once carbon tracking forms, the affected parts cannot be cleaned or repaired and must be replaced.
The Repair Process
Spark Plug Replacement
All four spark plugs were replaced with OEM-specification iridium spark plugs to ensure consistent ignition performance across every cylinder.
Ignition Coil Replacement
The faulty ignition coil on cylinder one was replaced and installed according to GM specifications.
GDI Carbon Cleaning Service
Because this Equinox uses a Gasoline Direct Injection engine, a comprehensive GDI carbon cleaning service was also performed. This service helped remove carbon deposits from intake valves, fuel injectors, and combustion chambers.
Quality Verification
After repairs were completed, the technician cleared all diagnostic trouble codes, performed a complete OBD system scan, and completed a final road test to confirm smooth engine operation.
Why Carbon Cleaning Is Important for Direct Injection Engines
Unlike traditional port fuel injection systems, direct injection engines spray fuel directly into the combustion chamber. Because fuel does not wash over the intake valves, carbon deposits can accumulate over time.
Excessive carbon buildup can cause rough idle, hesitation, reduced power, hard starting, poor fuel economy, and engine misfires.
For many GDI engines, carbon cleaning is recommended approximately every 25,000 to 30,000 miles, depending on driving conditions and fuel quality.
How to Prevent Future Ignition System Problems
Follow Spark Plug Replacement Intervals
Replace spark plugs according to the manufacturer’s recommended maintenance schedule, typically every 60,000 to 100,000 miles depending on plug type.
Use OEM-Specification Components
Not all spark plugs and ignition coils are created equal. Using parts designed for your vehicle helps ensure the correct heat range, spark gap, and electrical resistance.
Address Warning Lights Promptly
Never ignore a Check Engine Light, especially if it is flashing. Early diagnosis can help prevent additional damage and more costly repairs.
Schedule Regular Carbon Cleaning
Routine carbon cleaning can help maintain performance and reduce drivability concerns in direct injection engines.
Why Professional Diagnosis Matters
Modern vehicles rely on sophisticated engine management systems. Symptoms like rough running or hesitation may seem simple, but many different problems can cause the same drivability concerns.
Professional diagnostic testing helps identify the true root cause, prevent unnecessary parts replacement, and support reliable long-term vehicle performance.
Need Chevrolet Engine Diagnostics in Des Moines?
If your Chevrolet Equinox is running rough, hesitating during acceleration, or displaying a Check Engine Light, Joey’s Auto Shop in Des Moines is here to help.
Our ASE-certified technicians use advanced diagnostic equipment and proven repair procedures to identify vehicle problems accurately and repair them correctly.
Call Joey’s Auto Shop today at 515-745-0934to schedule your professional diagnostic service.
06/23/2026Read more
Why Is My Car's AC Blowing Warm Air?
Why Is My Car's AC Blowing Warm Air?
If your car's air conditioner blows cold air when you first turn it on but starts blowing warm air a few minutes later, don't assume it just needs a refrigerant recharge. While low refrigerant can cause poor cooling, this symptom often points to a larger problem, such as a failing AC compressor, refrigerant leak, or another component preventing the system from maintaining proper pressure.
At Joey's Auto Shop in Des Moines, Iowa, we recently diagnosed this exact concern on a 2015 Subaru Forester. The customer was concerned that the air conditioning started out cold but quickly became warm during normal driving.
After performing a complete AC system inspection and pressure test, our ASE-certified technician discovered multiple problems. The AC compressor was beginning to fail, and refrigerant leaks were found at the condenser and expansion valve assembly. Because the failing compressor had contaminated the system with debris, replacing only one component would not have provided a reliable repair.
We replaced the failed compressor, installed a new condenser and expansion valve, flushed the AC system to remove contamination, recharged it to Subaru's specifications, and verified proper operation with a final performance test. The result was consistent, ice-cold air throughout the entire drive.
Repair Summary
Vehicle: 2015 Subaru Forester
Customer Concern
- AC blows cold at first, then warm after a few minutes
- Poor cooling during normal driving
Cause
A failing AC compressor combined with refrigerant leaks at the condenser and expansion valve assembly caused the system to lose pressure and cooling performance.
Repair Performed
- Replaced AC compressor
- Replaced condenser
- Replaced expansion valve
- Flushed the complete AC system
- Recharged refrigerant to factory specifications
- Verified proper cooling and operating pressures
Why Does My AC Blow Cold at First, Then Turn Warm?
Your vehicle's air conditioning system depends on maintaining the correct refrigerant pressure to produce cold air.
When the compressor begins to fail or refrigerant escapes through a leak, the system may cool properly for a short time before pressure drops and cooling performance decreases.
Several problems can cause this symptom, including:
- Low refrigerant from a leak
- A failing AC compressor
- A restricted expansion valve
- A damaged condenser
- Cooling fan problems
- Internal contamination within the AC system
Although these issues can produce similar symptoms, professional diagnostic testing is the only way to determine the actual cause.
Common Signs of AC System Problems
If your air conditioner isn't working properly, you may notice:
- Cold air that gradually becomes warm
- AC that cools inconsistently
- Compressor cycling on and off frequently
- Grinding or squealing noises when the AC is operating
- Longer cooling times on hot days
Addressing these symptoms early often prevents additional damage and more expensive repairs.
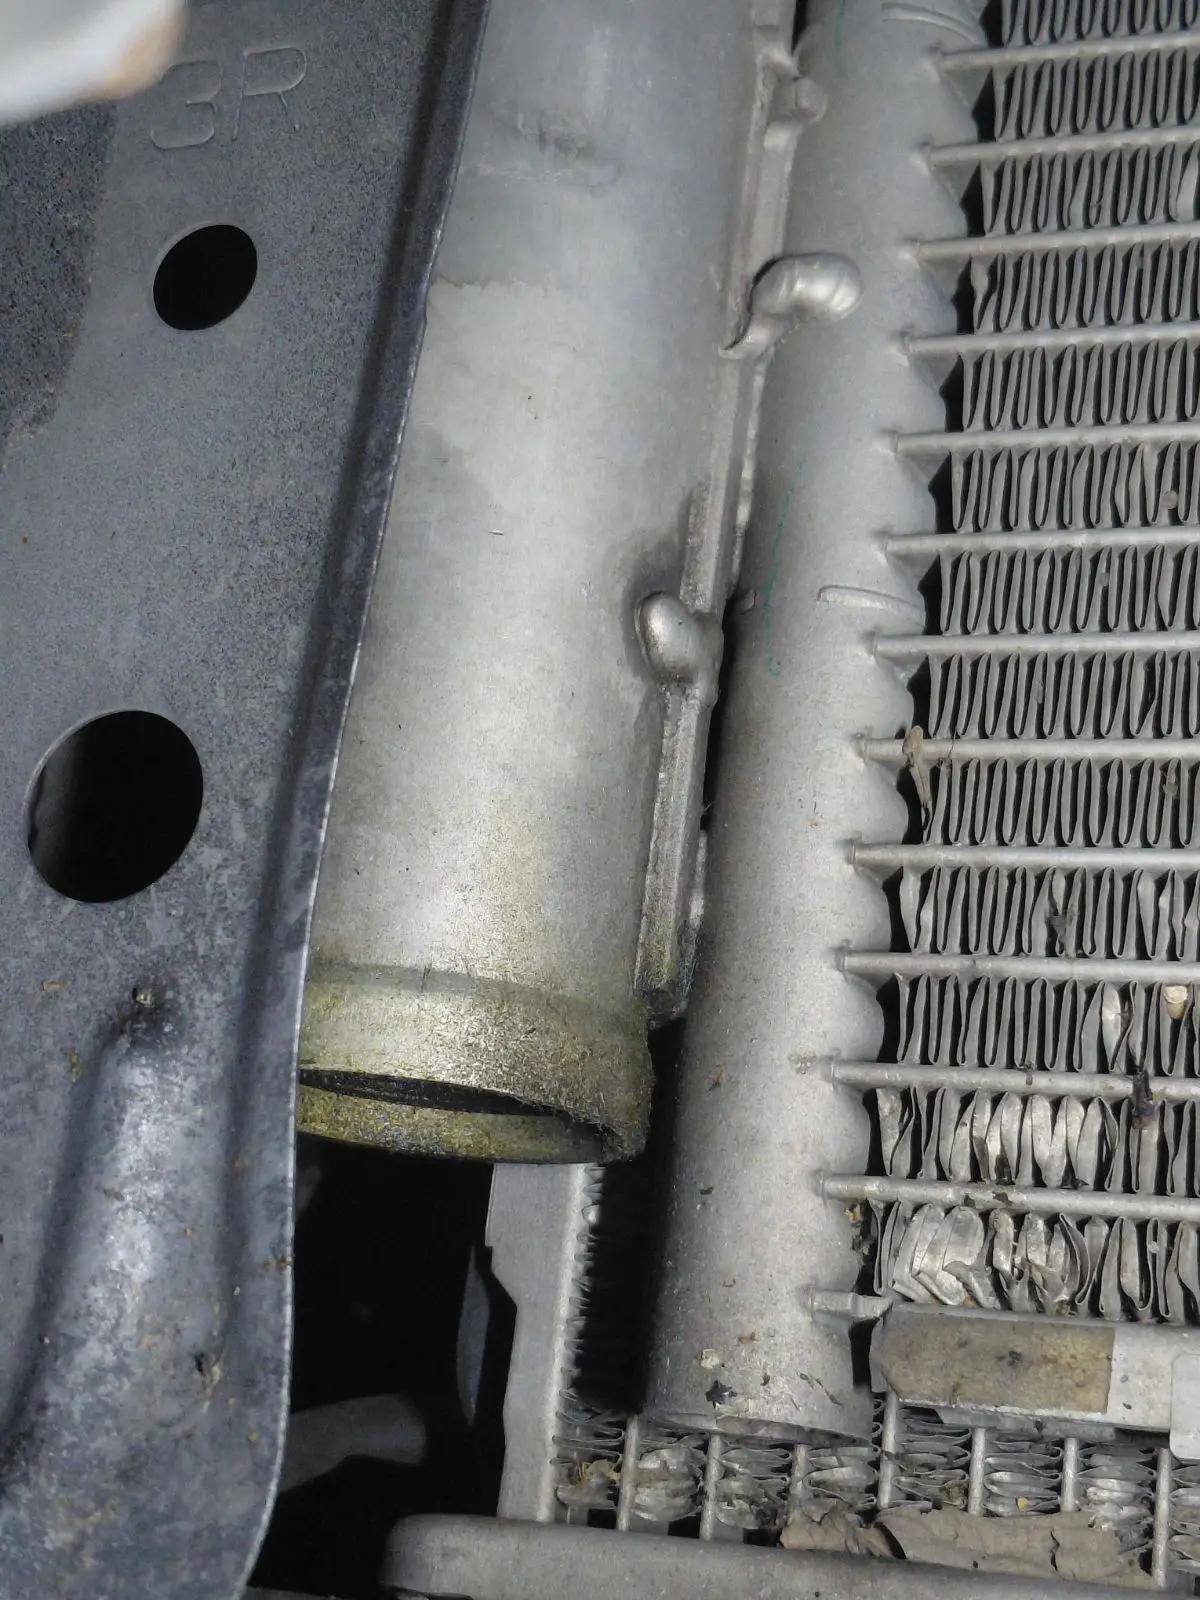
How We Diagnosed This Subaru Forester
Every repair at Joey's Auto Shop begins by confirming the customer's concern before replacing any parts.
For this Subaru Forester, our technician first verified that the AC produced cold air initially but lost cooling as the system continued to operate.
Our diagnostic procedure included:
- Visual inspection of the complete AC system
- Refrigerant pressure testing
- Leak inspection
- Compressor performance testing
- Inspection of the condenser, expansion valve, and related components
Testing confirmed the compressor was no longer maintaining proper operating pressure.
Further inspection revealed refrigerant leaks at the condenser and expansion valve assembly. As the compressor deteriorated internally, it contaminated the refrigerant with metal debris, placing the remaining AC components at risk.
Because of this contamination, replacing only the compressor would have significantly increased the likelihood of another failure.
Why Replacing Only One AC Component Doesn't Always Fix the Problem
One of the most common misconceptions about air conditioning repairs is that replacing the failed compressor is enough.
Unfortunately, that's not always the case.
When an AC compressor begins to fail internally, it often releases tiny metal particles into the refrigerant.
Those particles circulate throughout the system and can:
- Restrict the expansion valve
- Contaminate the condenser
- Damage replacement components
- Shorten the life of a new compressor
That's why professional AC repairs often include replacing additional components and flushing the entire system before installing new parts.
Removing contamination helps protect your investment and restores long-term reliability.
Repair Procedure
Once the diagnosis was confirmed, our ASE-certified technician completed the following repairs:
- Safely recovered the refrigerant
- Removed the failed compressor
- Installed a new OEM-equivalent compressor
- Replaced the condenser
- Installed a new expansion valve
- Flushed the complete AC system
- Recharged the system with the correct amount of R-134a refrigerant
- Verified proper system pressures and vent temperatures
- Performed a final road test
Following the repair, the Subaru consistently produced cold air during extended operation, even in hot summer conditions.
Can I Just Recharge My AC?
Sometimes—but not always.
If your AC is low on refrigerant because of a leak, adding more refrigerant only provides a temporary improvement.
The refrigerant will continue leaking until the source of the problem is repaired.
Likewise, if the compressor is failing internally, a recharge will not restore proper cooling and may delay repairs while additional damage occurs.
Professional diagnostic testing identifies the root cause before any repairs are recommended.
Is It Safe to Drive With an AC That Blows Warm Air?
Unlike many engine problems, an AC system that blows warm air usually won't leave you stranded.
However, continuing to operate a failing compressor can spread additional debris throughout the system, increasing repair costs.
If you notice your AC losing cooling performance, scheduling an inspection early often results in less extensive repairs.
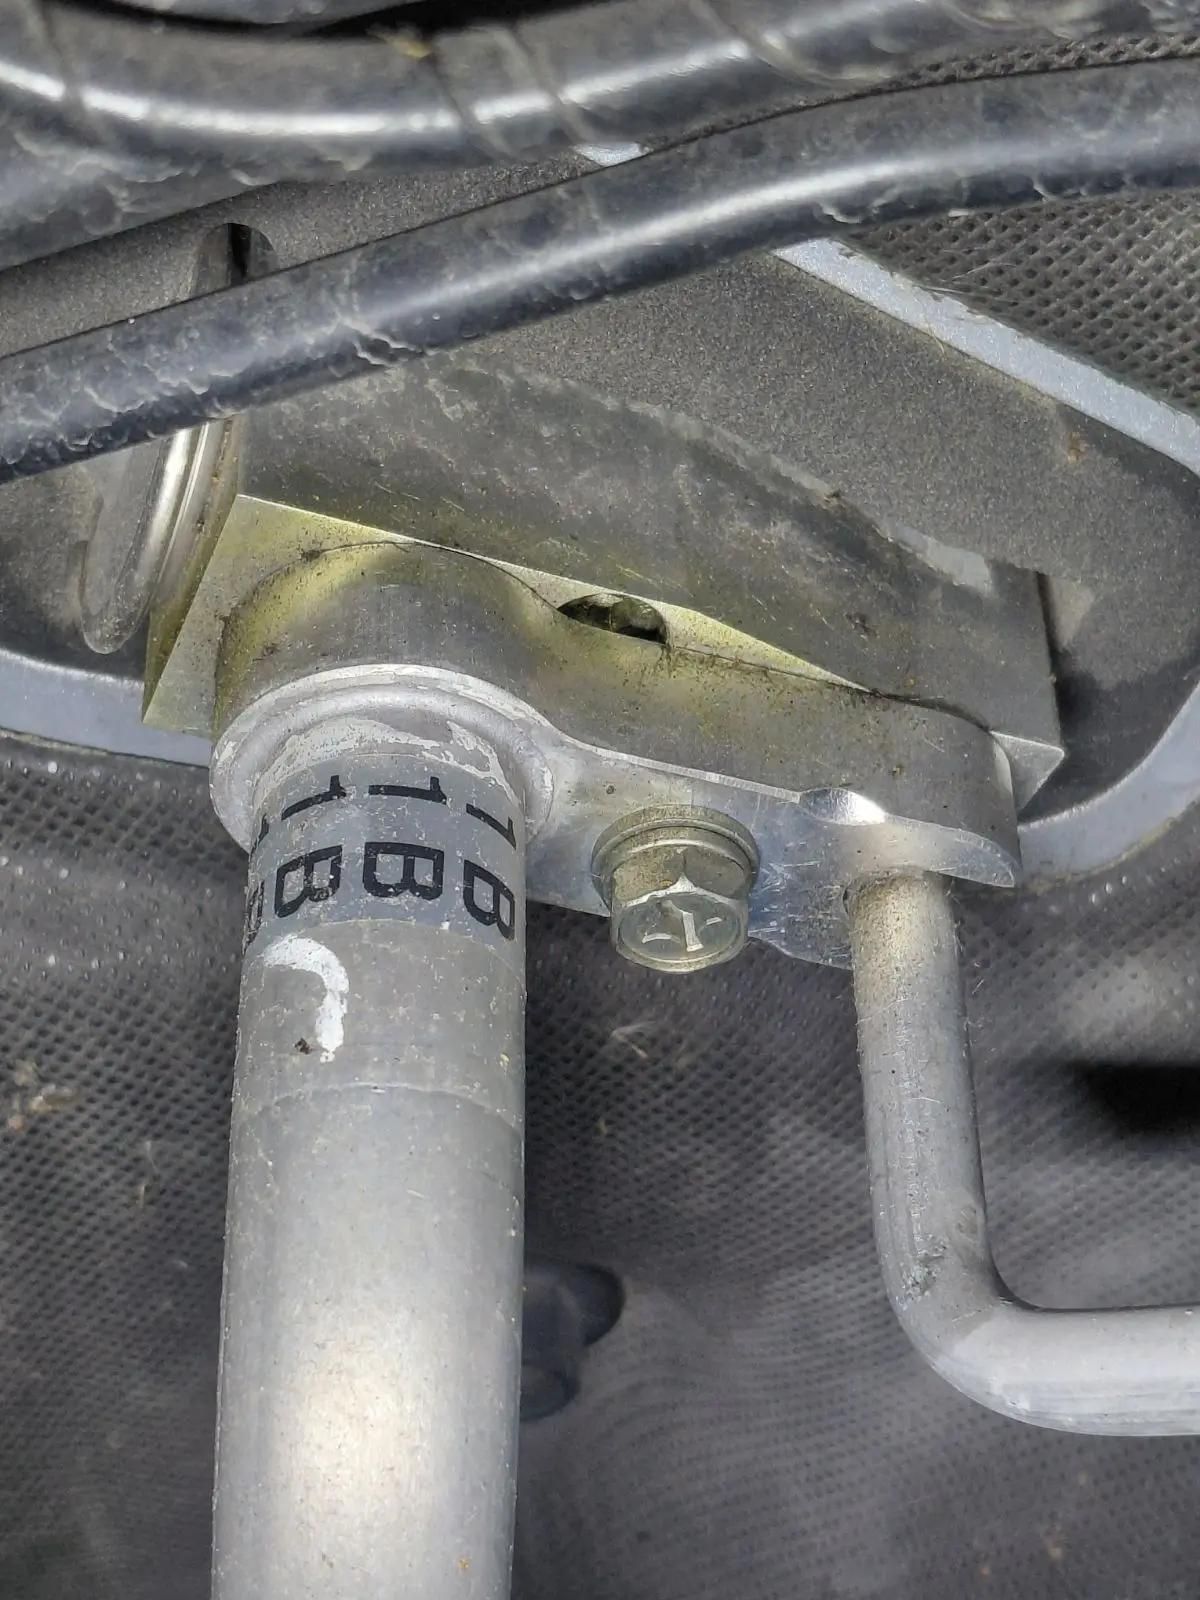
How Can I Prevent AC Problems?
Routine maintenance helps keep your air conditioning system operating efficiently.
We recommend:
- Running your AC periodically throughout the year
- Having the system inspected before summer
- Addressing refrigerant leaks promptly
- Listening for unusual compressor noises
- Repairing cooling problems before complete failure occurs
Preventative maintenance can extend the life of your AC system and reduce the likelihood of major repairs.
Why Early Diagnosis Saves Money
Many AC repairs begin as relatively small problems.
A slow refrigerant leak or a weak compressor may only affect cooling performance at first.
If ignored, those same issues can contaminate additional components and turn a simple repair into a complete AC system overhaul.
At Joey's Auto Shop, our goal is to identify the root cause early, recommend the repairs your vehicle actually needs, and help you avoid unnecessary expenses whenever possible.
Trust Joey's Auto Shop for Professional AC Repair in Des Moines
If your vehicle's air conditioner blows cold air at first but quickly turns warm, don't ignore the warning signs.
Our ASE-certified technicians use professional diagnostic equipment to accurately identify the cause of your AC concerns before recommending repairs. We inspect the complete air conditioning system, explain our findings with detailed photos, and provide honest recommendations based on your vehicle's condition.
For more than 14 years, Joey's Auto Shop has proudly served drivers throughout Des Moines with honest diagnostics, quality repairs, and exceptional customer service. Our technicians have over 50 years of combined professional experience, and qualifying repairs are backed by our 24-month/24,000-mile warranty.
If your AC isn't keeping you cool, call Joey's Auto Shop today at 515-745-0934 or visit us at 5875 Fleur Drive, Des Moines, Iowa.
We'll diagnose the problem correctly the first time and get your air conditioning performing the way it was designed to.
07/27/2026Read more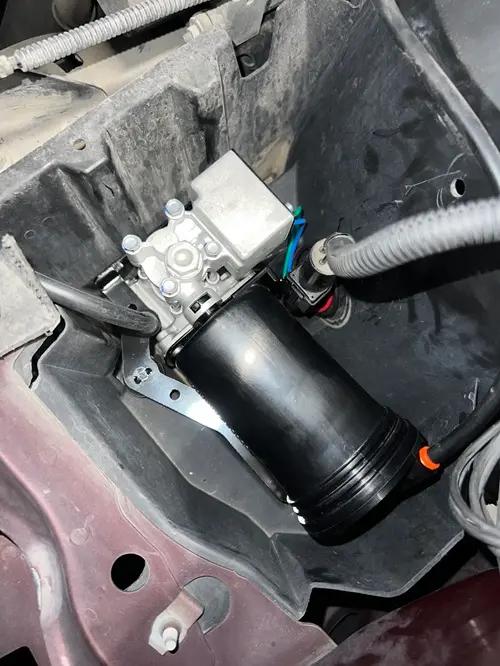
Why Is My Lincoln Town Car Showing a "Check Air Suspension" Warning?
Why Is My Lincoln Town Car Showing a "Check Air Suspension" Warning?
If the rear of your Lincoln Town Car is sitting low and you're seeing a "Check Air Suspension" warning message on the dashboard, don't ignore it. Your air suspension system is designed to maintain the correct ride height for a smooth, comfortable ride. When one of its components fails, the suspension can no longer properly support the vehicle, leading to poor handling, an uneven ride, and additional suspension damage if left unrepaired.
At Joey's Auto Shop in Des Moines, Iowa, we recently diagnosed a Lincoln Town Car with this exact concern. The customer noticed the rear suspension had collapsed and a "Check Air Suspension" warning message appeared on the instrument cluster.
After performing a complete inspection and electronic diagnostic testing, our ASE-certified technician confirmed the air suspension compressor had failed and could no longer build enough pressure to support the rear suspension. We replaced the compressor with an OEM-specification unit, recalibrated the suspension system, and verified proper ride height during a final road test.
Repair Summary
Vehicle: Lincoln Town Car
Customer Concern
- Rear suspension sitting low
- "Check Air Suspension" warning message displayed
- Poor ride quality
Cause
Failed air suspension compressor that could no longer maintain proper system pressure.
Repair Performed
Replaced the air suspension compressor, recalibrated the suspension control module, and verified proper suspension operation.
What Does the "Check Air Suspension" Warning Mean?
Your Lincoln Town Car uses an electronically controlled air suspension system instead of traditional rear coil springs. An air compressor supplies pressurized air to inflatable air springs that automatically adjust the vehicle's ride height.
When the suspension control module detects that the system can't maintain proper pressure, it illuminates the "Check Air Suspension" warning message.
While a failed compressor is a common cause, other possible issues include:
- Leaking air springs
- Damaged air lines
- Faulty ride height sensors
- Electrical faults within the air suspension system
A professional inspection is the best way to determine the exact cause before replacing any parts.
Common Symptoms of Air Suspension Problems
Besides the warning message, you may notice several other symptoms as the system begins to fail.
Common signs include:
- Rear of the vehicle sitting lower than normal
- Vehicle leaning to one side
- Rough or bouncy ride quality
- Air compressor running constantly
- Air compressor not running at all
- Suspension rubbing over bumps or while backing up
- Poor handling or vehicle instability
If your vehicle is experiencing any of these symptoms, scheduling an inspection early can often prevent more extensive suspension repairs.
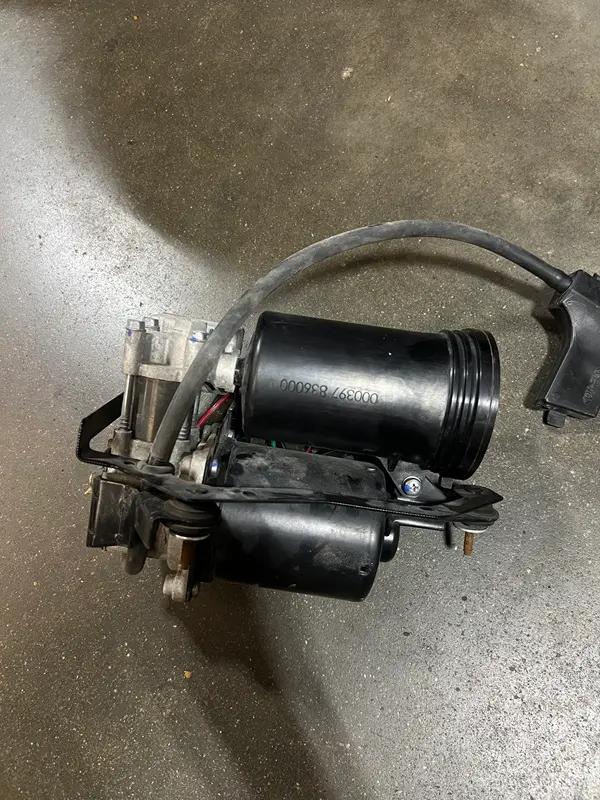
How We Diagnosed This Lincoln Town Car
Every repair at Joey's Auto Shop begins by verifying the customer's concern before replacing any components.
For this Lincoln Town Car, our technician performed a complete air suspension inspection that included:
- Visual inspection of the rear suspension system
- Electronic scan for suspension fault codes
- Air compressor performance testing
- System pressure testing
- Inspection of the air springs and air lines for leaks
During testing, we confirmed the compressor was no longer capable of generating enough air pressure to properly inflate the rear air springs.
Because the system couldn't maintain the required pressure, the rear suspension sagged and the suspension control module turned on the "Check Air Suspension" warning message.
Repair Procedure
Once the diagnosis was confirmed, our ASE-certified technician completed the following repairs:
- Removed the failed air suspension compressor
- Installed a new OEM-specification compressor
- Pressurized the air suspension system
- Inspected the system for leaks
- Recalibrated the suspension control module
- Cleared all diagnostic fault codes
- Performed a comprehensive road test to verify proper ride height and suspension operation
After the repair, the rear suspension returned to its proper ride height, the warning message was eliminated, and the vehicle once again delivered the smooth ride Lincoln owners expect.
Can I Drive With the "Check Air Suspension" Warning On?
Although your vehicle may still be drivable, we don't recommend delaying repairs.
Driving with a failed air suspension system can:
- Reduce vehicle stability
- Increase tire wear
- Affect braking performance
- Cause additional suspension damage
- Overwork the remaining suspension components
The sooner the problem is diagnosed, the less likely it is to result in more expensive repairs.
What Causes an Air Suspension Compressor to Fail?
Air suspension compressors naturally wear over time as they repeatedly inflate and adjust the suspension.
Common causes of compressor failure include:
- High mileage
- Air spring leaks that overwork the compressor
- Moisture contamination
- Electrical faults
- Normal wear of the compressor motor and seals
If a leaking air spring isn't repaired, even a brand-new compressor can fail prematurely because it's forced to run continuously trying to maintain system pressure.
How Can I Prevent Air Suspension Problems?
Routine inspections are the best way to keep your air suspension system operating properly.
We recommend:
- Having your suspension inspected annually
- Addressing warning lights immediately
- Repairing leaking air springs before replacing the compressor
- Listening for compressors that run excessively
- Having the system inspected anytime the vehicle begins sitting unevenly
Catching small problems early often prevents expensive air suspension repairs later.
Why Prompt Repairs Save Money
Many air suspension problems begin with a small leak or a weak compressor.
Ignoring these warning signs allows the compressor to work harder than it was designed to, eventually leading to complete failure and additional suspension damage.
Early diagnosis can help prevent:
- Premature compressor failure
- Air spring damage
- Suspension component wear
- Tire wear
- Additional labor costs
At Joey's Auto Shop, we believe finding the root cause—not simply replacing parts—is the best way to provide long-lasting repairs and save our customers money.
Trust Joey's Auto Shop for Lincoln Air Suspension Repair in Des Moines
If your Lincoln Town Car is displaying a "Check Air Suspension" warning message or the rear suspension is sitting low, don't wait for the problem to get worse.
Our ASE-certified technicians use professional diagnostic equipment to accurately identify the cause of your suspension concern before recommending repairs. We inspect the entire air suspension system to ensure every component is operating properly and explain our findings with detailed photos and honest recommendations.
For more than 14 years, Joey's Auto Shop has proudly served drivers throughout Des Moines with quality repairs, honest diagnostics, and exceptional customer service. Our technicians have over 50 years of combined professional experience, and qualifying repairs are backed by our 24-month/24,000-mile warranty.
If your Lincoln Town Car isn't riding like it should, give Joey's Auto Shop a call today at 515-745-0934 or visit us at 5875 Fleur Drive, Des Moines, Iowa.
We'll restore your air suspension system and get your Lincoln riding comfortably and safely again.
07/27/2026Read more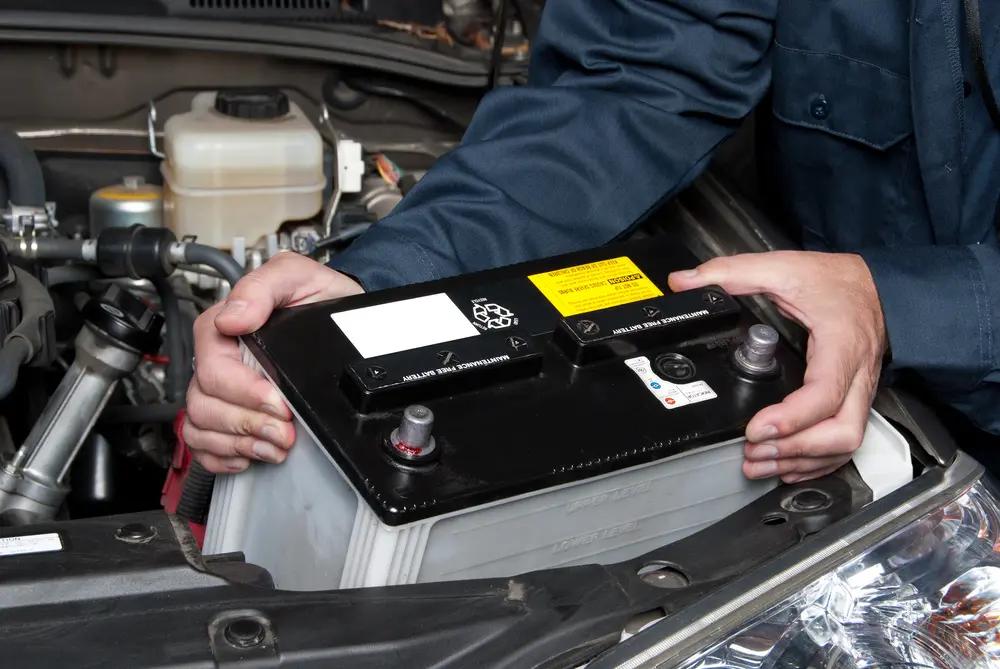
Why Your Car Battery May Struggle After Summer
Summer can be hard on your car battery, even if you do not notice a problem right away.
Most drivers associate dead batteries with cold weather, but summer heat can actually do much of the damage that causes a battery to fail later. High temperatures can speed up internal wear, reduce battery life, and leave your vehicle more vulnerable once cooler weather arrives.
At Joey’s Auto Shop, we help drivers throughout the Des Moines, IA area identify battery and charging system problems before they turn into an unexpected no-start situation.
How Summer Heat Affects Your Battery
Your battery relies on a chemical reaction to store and deliver the energy needed to start your vehicle and power its electrical systems.
Heat speeds up that chemical process, but excessive temperatures can also accelerate deterioration inside the battery.
Over time, summer heat may contribute to:
- Internal corrosion
- Loss of battery fluid
- Reduced charging capacity
- Deterioration of internal components
- Shortened battery life
The frustrating part is that your battery may continue working normally through the summer even while its condition is declining.
That is why battery trouble can seem to appear suddenly later in the year.
Why Problems Often Show Up After Summer
A weakened battery may still have enough power to start your engine during warm weather.
When temperatures begin to drop, however, the battery has to work harder to deliver the power needed to start the vehicle.
If months of summer heat have already reduced its capacity, cooler weather can expose that weakness.
In other words, summer may cause the damage while fall and winter reveal it.
Signs Your Battery May Be Getting Weak
A dead battery is not always the first warning sign.
Watch for symptoms such as:
Slow Engine Cranking
If your engine turns over more slowly than usual, the battery may be struggling to provide enough starting power.
Clicking When You Try to Start the Vehicle
Clicking can indicate that there is not enough electrical power reaching the starter.
Dim or Flickering Lights
Headlights, interior lights, or dashboard lights that appear dimmer than usual may be related to low voltage or a charging system problem.
Electrical Problems
A weak battery can sometimes contribute to unusual electrical behavior, including warning lights, accessories that do not operate normally, or other intermittent issues.
Needing a Jump-Start
If your vehicle has needed a jump-start recently, especially more than once, it is important to find out why.
Battery Warning Light
A battery-shaped warning light can point to a charging system problem. It does not necessarily mean the battery itself has failed.
Sometimes the Battery Is Not the Real Problem
If your car will not start, replacing the battery immediately is not always the right solution.
The battery works together with the alternator, starter, wiring, terminals, and other electrical components.
For example, a healthy battery can repeatedly lose its charge if the alternator is not properly recharging it while you drive.
That is why proper testing matters.
Joey’s Auto Shop offers battery testing, alternator repair, alternator replacement, and auto electrical service to help identify what is actually causing the problem.
How Long Does a Car Battery Last?
Battery life varies depending on the vehicle and driving conditions.
Factors that can affect battery lifespan include:
- Climate
- Driving habits
- Battery type
- Vehicle electrical demand
- Charging system condition
- How often the vehicle is driven
- How frequently the vehicle makes short trips
If your battery is already several years old, having it tested can give you a better idea of how much useful life may remain.
Short Trips Can Make Battery Problems Worse
Starting your engine uses a significant amount of electrical energy.
Once the vehicle is running, the alternator begins recharging the battery.
If you mostly make short trips, the vehicle may not run long enough to fully replenish the energy used during startup.
Over time, that can leave the battery at a lower state of charge, especially if summer heat has already weakened it.
Check for Corrosion and Loose Connections
Not every battery problem begins inside the battery.
Corrosion around the terminals, loose cables, damaged wiring, or poor electrical connections can interfere with the flow of power.
You may notice white, blue, or greenish buildup around the battery terminals if corrosion is present.
These issues can be checked during routine vehicle inspections or battery service.
When Should You Have Your Battery Tested?
The end of summer is a good time to test your battery, especially if:
- Your battery is several years old
- The engine has started cranking slowly
- You have recently needed a jump-start
- You notice dim lights or electrical issues
- The vehicle has been sitting for long periods
- You mostly drive short distances
- You are not sure how old the battery is
Testing can help determine whether the battery still has enough starting capacity or whether replacement should be considered.
Don't Wait Until Your Vehicle Won't Start
Battery problems rarely happen at a convenient time.
A weak battery can leave you stuck at home, at work, in a parking lot, or on a cold morning when you need to get somewhere.
Testing the battery before it completely fails gives you the chance to deal with the issue on your schedule.
Joey’s Auto Shop provides both battery service and battery replacement when testing shows that the battery is no longer reliable.
Include Your Battery in Seasonal Maintenance
Battery condition is only one part of preparing your vehicle for the months ahead.
As summer ends, it is also a good time to check:
- Tires and tire pressure
- Brakes
- Engine oil
- Coolant
- Belts and hoses
- Wiper blades
- Exterior lights
- Filters
- Charging system performance
- Battery condition
Staying current with preventative maintenance can help catch developing problems before they become larger repairs or roadside issues.
Car Battery Service in the Des Moines, IA Area
If your vehicle has been starting slowly, your battery is getting older, or you simply want to know whether it is ready for colder weather, Joey’s Auto Shop can help.
Our team can inspect the battery, charging system, electrical connections, and related components to determine what your vehicle actually needs.
If replacement is necessary, taking care of it early can help prevent an unexpected no-start situation later.
For professional auto repair in Des Moines, IA, contact Joey’s Auto Shop and schedule your battery or vehicle inspection today.
A simple battery check now can help keep your vehicle starting reliably after summer and into the colder months ahead.
09/03/2026Read more
Request an Appointment
Let us know how we can help you. Schedule your appointment online.







We are a Digital Shop
The Joey's Auto Shop technicians use the latest technology to not only tell you if there are any issues with your vehicle, but show you. If we uncover an issue the photo will be e-mailed to you for your records. At the end of every visit you will receive a detailed report regarding the general health of your vehicle. Our #1 goal is to keep you safe on the road.